# 深入理解 Flutter 布局约束
> 理解 Flutter widget 约束模型,了解它是如何确定自身的大小,位置以及影响彼此的。
 :::note
If you are experiencing specific layout errors,
you might check out [Common Flutter errors][].
:::
[Common Flutter errors]: /testing/common-errors
When someone learning Flutter asks you why some widget
with `width: 100` isn't 100 pixels wide,
the default answer is to tell them to put that widget
inside of a `Center`, right?
我们会经常听到一些开发者在学习 Flutter 时的疑惑:为什么我设置了 `width:100`,
但是看上去却不是 100 像素宽呢。(注意,本文中的“像素”均指的是逻辑像素)
通常你会回答,将这个 Widget 放进 `Center` 中,对吧?
**Don't do that.**
**别这么干。**
If you do, they'll come back again and again,
asking why some `FittedBox` isn't working,
why that `Column` is overflowing, or what
`IntrinsicWidth` is supposed to be doing.
如果你这样做了,他们会不断找你询问这样的问题:为什么 `FittedBox` 又不起作用了?
为什么 `Column` 又溢出边界,亦或是 `IntrinsicWidth` 应该做什么。
Instead, first tell them that Flutter layout is very different
from HTML layout (which is probably where they're coming from),
and then make them memorize the following rule:
其实我们首先应该做的,是告诉他们 Flutter 的布局方式与 HTML 的布局差异相当大
(这些开发者很可能是 Web 开发),然后要让他们熟记这条规则:
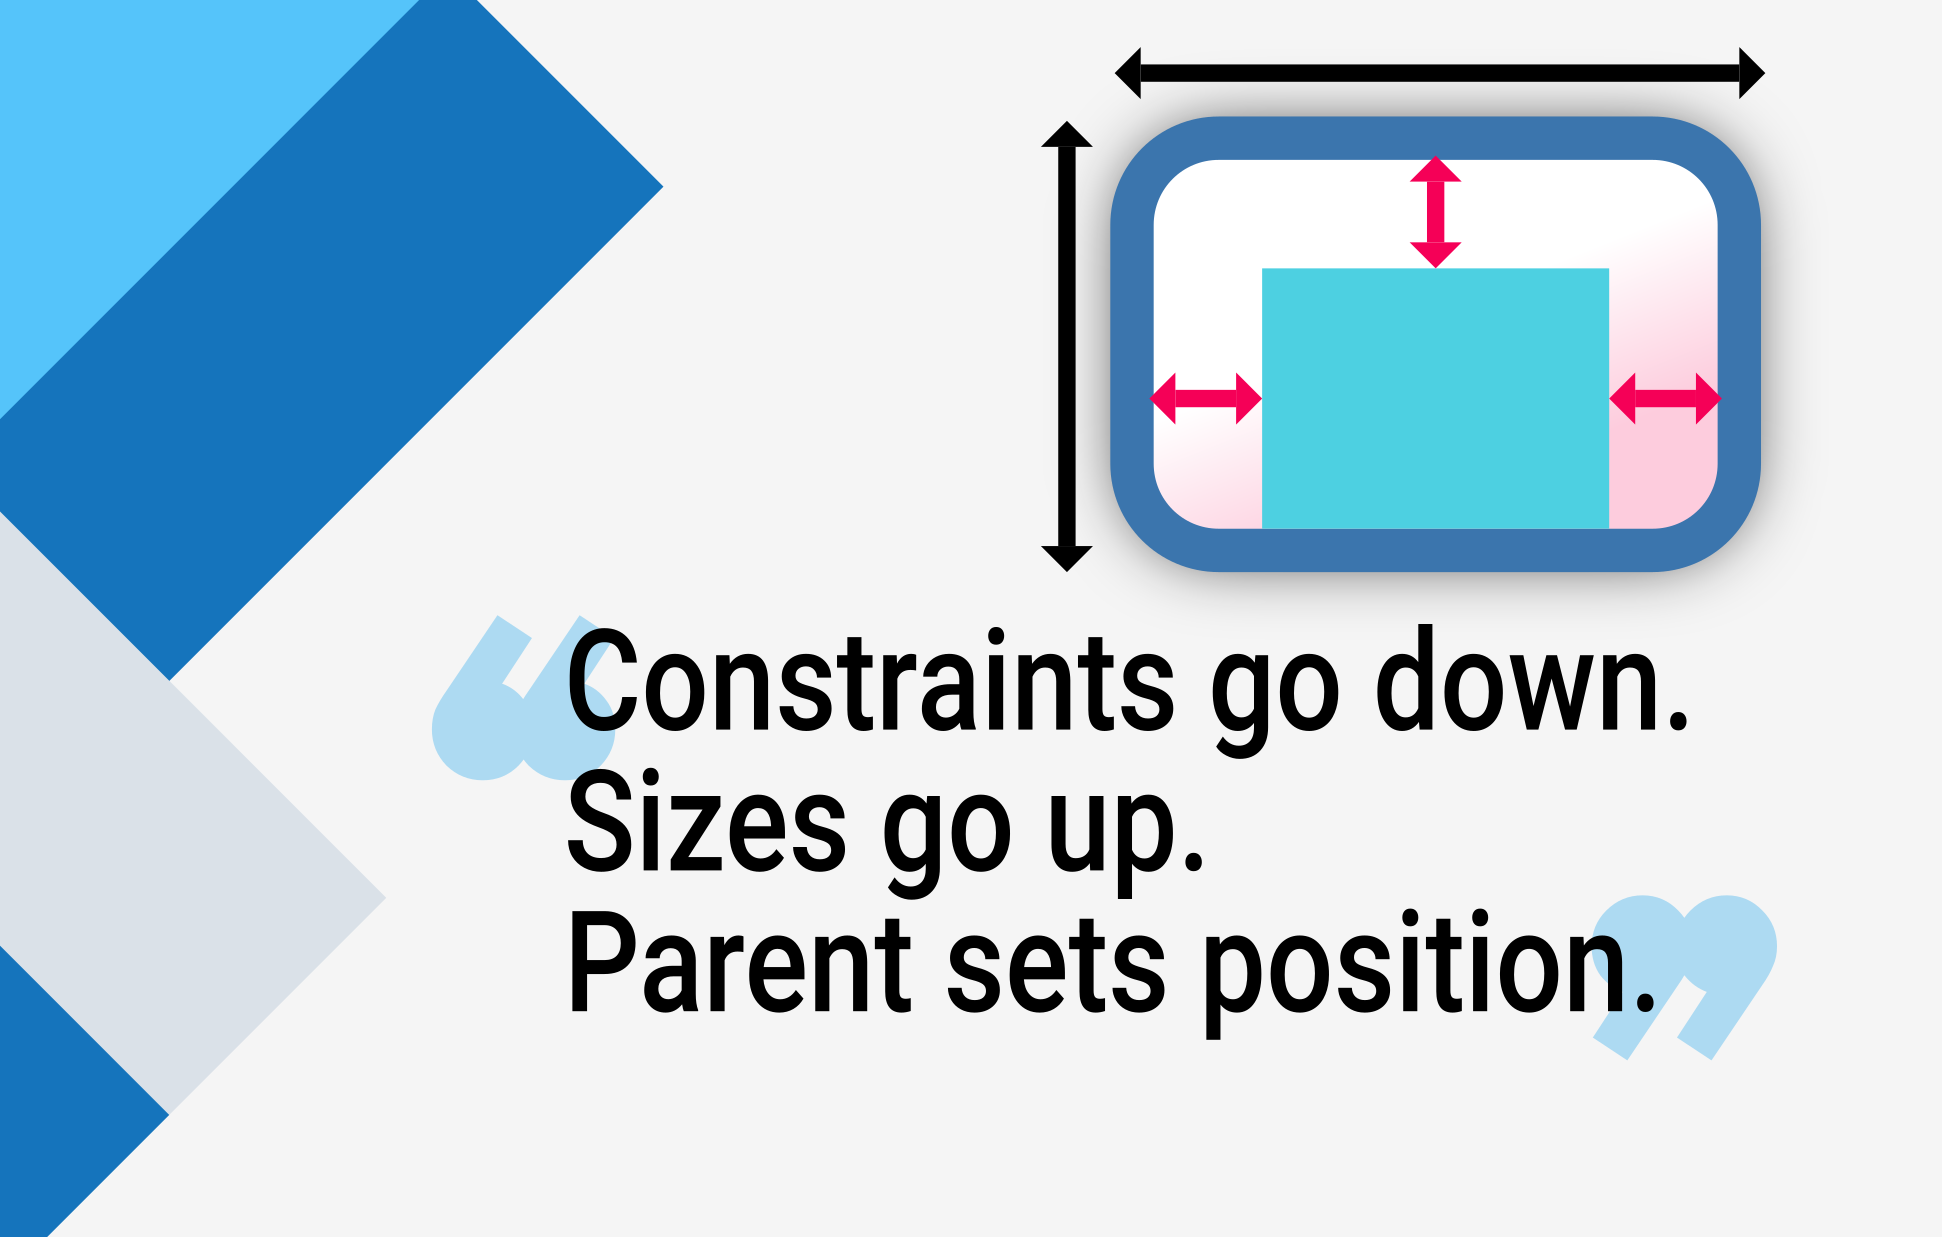
Constraints go down. Sizes go up. Parent sets position.
首先,上层 widget 向下层 widget 传递约束条件;
:::note
If you are experiencing specific layout errors,
you might check out [Common Flutter errors][].
:::
[Common Flutter errors]: /testing/common-errors
When someone learning Flutter asks you why some widget
with `width: 100` isn't 100 pixels wide,
the default answer is to tell them to put that widget
inside of a `Center`, right?
我们会经常听到一些开发者在学习 Flutter 时的疑惑:为什么我设置了 `width:100`,
但是看上去却不是 100 像素宽呢。(注意,本文中的“像素”均指的是逻辑像素)
通常你会回答,将这个 Widget 放进 `Center` 中,对吧?
**Don't do that.**
**别这么干。**
If you do, they'll come back again and again,
asking why some `FittedBox` isn't working,
why that `Column` is overflowing, or what
`IntrinsicWidth` is supposed to be doing.
如果你这样做了,他们会不断找你询问这样的问题:为什么 `FittedBox` 又不起作用了?
为什么 `Column` 又溢出边界,亦或是 `IntrinsicWidth` 应该做什么。
Instead, first tell them that Flutter layout is very different
from HTML layout (which is probably where they're coming from),
and then make them memorize the following rule:
其实我们首先应该做的,是告诉他们 Flutter 的布局方式与 HTML 的布局差异相当大
(这些开发者很可能是 Web 开发),然后要让他们熟记这条规则:
Constraints go down. Sizes go up. Parent sets position.
首先,上层 widget 向下层 widget 传递约束条件;
然后,下层 widget 向上层 widget 传递大小信息。
最后,上层 widget 决定下层 widget 的位置。
Flutter layout can't really be understood without knowing
this rule, so Flutter developers should learn it early on.
如果我们在开发时无法熟练运用这条规则,在布局时就不能完全理解其原理,
所以越早掌握这条规则越好!
In more detail:
更多细节:
* A widget gets its own **constraints** from its **parent**.
A _constraint_ is just a set of 4 doubles:
a minimum and maximum width, and a minimum and maximum height.
Widget 会通过它的 **父级** 获得自身的约束。
约束实际上就是 4 个浮点类型的集合:
最大/最小宽度,以及最大/最小高度。
* Then the widget goes through its own list of **children**.
One by one, the widget tells its children what their
**constraints** are (which can be different for each child),
and then asks each child what size it wants to be.
然后,这个 widget 将会逐个遍历它的 **children** 列表。向子级传递
**约束**(子级之间的约束可能会有所不同),然后询问它的每一个子级需要用于布局的大小。
* Then, the widget positions its **children**
(horizontally in the `x` axis, and vertically in the `y` axis),
one by one.
然后,这个 widget 就会对它子级的 **children** 逐个进行布局。
(水平方向是 `x` 轴,竖直是 `y` 轴)
* And, finally, the widget tells its parent about its own **size**
(within the original constraints, of course).
最后,widget 将会把它的大小信息向上传递至父 widget(包括其原始约束条件)。
For example, if a composed widget contains a column
with some padding, and wants to lay out its two children
as follows:
例如,如果一个 widget 中包含了一个具有 padding 的 Column,
并且要对 Column 的子 widget 进行如下的布局:
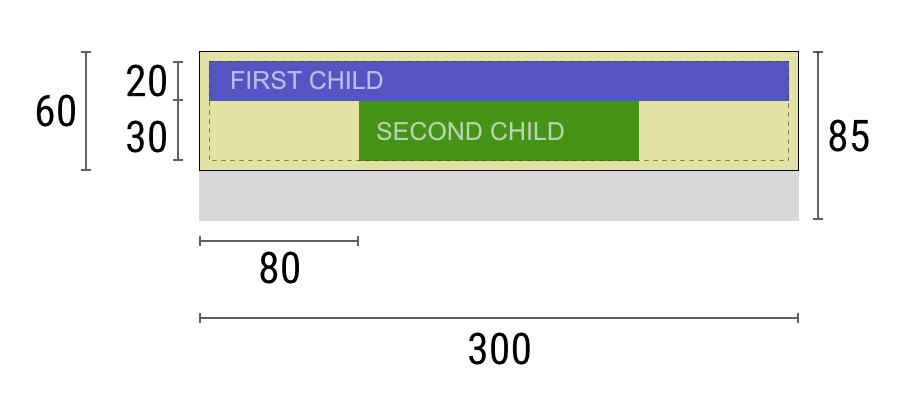 The negotiation goes something like this:
那么谈判将会像这样:
**Widget**: "Hey parent, what are my constraints?"
**Widget**: "嘿!我的父级。我的约束是多少?"
**Parent**: "You must be from `0` to `300` pixels wide,
and `0` to `85` tall."
**Parent**: "你的宽度必须在 `0` 到 `300` 像素之间,高度必须在 `0` 到 `85` 之间。"
**Widget**: "Hmmm, since I want to have `5` pixels of padding,
then my children can have at most `290` pixels of width
and `75` pixels of height."
**Widget**: "嗯...我想要 `5` 个像素的内边距,这样我的子级能最多拥有 `290` 个像素宽度和 `75` 个像素高度。"
**Widget**: "Hey first child, You must be from `0` to `290`
pixels wide, and `0` to `75` tall."
**Widget**: "嘿,我的第一个子级,你的宽度必须要在 `0` 到 `290`,长度在 `0` 到 `75` 之间。"
**First child**: "OK, then I wish to be `290` pixels wide,
and `20` pixels tall."
**First child**: "OK,那我想要 `290` 像素的宽度,`20` 个像素的长度。"
**Widget**: "Hmmm, since I want to put my second child below the
first one, this leaves only `55` pixels of height for
my second child."
**Widget**: "嗯...由于我想要将我的第二个子级放在第一个子级下面,所以我们仅剩 `55` 个像素的高度给第二个子级了。"
**Widget**: "Hey second child, You must be from `0` to `290` wide,
and `0` to `55` tall."
**Widget**: "嘿,我的第二个子级,你的宽度必须要在 `0` 到 `290`,长度在 `0` 到 `55` 之间。"
**Second child**: "OK, I wish to be `140` pixels wide,
and `30` pixels tall."
**Second child**: "OK,那我想要 `140` 像素的宽度,`30` 个像素的长度。"
**Widget**: "Very well. My first child has position `x: 5` and `y: 5`,
and my second child has `x: 80` and `y: 25`."
**Widget**: "很好。我的第一个子级将被放在 `x: 5` & `y: 5` 的位置,
而我的第二个子级将在 `x: 80` & `y: 25` 的位置。"
**Widget**: "Hey parent, I've decided that my size is going to be `300`
pixels wide, and `60` pixels tall."
**Widget**: "嘿,我的父级,我决定我的大小为 `300` 像素宽度,`60` 像素高度。"
## Limitations
## 限制
Flutter's layout engine is designed to be a one-pass process.
This means that Flutter lays out its widgets very efficiently,
but does result in a few limitations:
Flutter 的布局引擎的设计初衷是可以一次性完成整个布局的构建。
这使得它非常高效,但同时会有一些限制:
* A widget can decide its own size only within the
constraints given to it by its parent.
This means a widget usually
**can't have any size it wants**.
一个 widget 仅在其父级给其约束的情况下才能决定自身的大小。
这意味着 widget 通常情况下 **不能任意获得其想要的大小**。
* A widget **can't know and doesn't decide its own position
in the screen**, since it's the widget's parent who decides
the position of the widget.
一个 widget **无法知道,也不需要决定其在屏幕中的位置**。
因为它的位置是由其父级决定的。
* Since the parent's size and position, in its turn,
also depends on its own parent, it's impossible to
precisely define the size and position of any widget
without taking into consideration the tree as a whole.
当轮到父级决定其大小和位置的时候,同样的也取决于它自身的父级。
所以,在不考虑整棵树的情况下,几乎不可能精确定义任何 widget 的大小和位置。
* If a child wants a different size from its parent and
the parent doesn't have enough information to align it,
then the child's size might be ignored.
**Be specific when defining alignment.**
如果子级想要拥有和父级不同的大小,然而父级没有足够的空间对其进行布局的话,
子级的设置的大小可能会不生效。
**这时请明确指定它的对齐方式**
In Flutter, widgets are rendered by their underlying
[`RenderBox`][] objects. Many boxes in Flutter,
especially those that just take a single child,
pass their constraint on to their children.
在 Flutter 世界中,widget 是由它们的 [`RenderBox`][] 对象进行实际渲染的。
大部分特别是只有一个子节点的 box 会直接将限制传递下去。
Generally, there are three kinds of boxes,
in terms of how they handle their constraints:
总的来说,box 分成以下几类,它们有不同的处理大小限制的方式:
* Those that try to be as big as possible.
For example, the boxes used by [`Center`][] and
[`ListView`][].
尽可能地撑满。例如 [`Center`][] 和 [`ListView`][] 使用的 box。
* Those that try to be the same size as their children.
For example, the boxes used by [`Transform`][] and
[`Opacity`][].
尽可能地保持与子节点一致。例如 [`Transform`][] 和 [`Opacity`][] 使用的 box。
* Those that try to be a particular size.
For example, the boxes used by [`Image`][] and
[`Text`][].
尽可能地布局为指定大小。例如 [`Image`][] 和 [`Text`][] 使用的 box。
Some widgets, for example [`Container`][],
vary from type to type based on their constructor arguments.
The [`Container`][] constructor defaults
to trying to be as big as possible, but if you give it a `width`,
for instance, it tries to honor that and be that particular size.
像 [`Container`][] 这样的 widget 会根据不同的参数进行不同的布局。
[`Container`][] 的默认构造会让其尽可能地撑满大小限制,
但如果你设置了 `width`,它就会尽可能地遵照你设置的大小。
Others, for example [`Row`][] and [`Column`][] (flex boxes)
vary based on the constraints they are given,
as described in the [Flex](#flex) section.
其他像 [`Row`][] 和 [`Column`][](Flex 系列)这样的 widget
会根据它们的限制进行不同的布局。在 [Flex](#flex) 小节中有更详细的描述。
[`Center`]: https://api.flutter-io.cn/flutter/widgets/Center-class.html
[`Column`]: https://api.flutter-io.cn/flutter/widgets/Column-class.html
[`Container`]: https://api.flutter-io.cn/flutter/widgets/Container-class.html
[`Image`]: https://api.flutter-io.cn/flutter/dart-ui/Image-class.html
[`ListView`]: https://api.flutter-io.cn/flutter/widgets/ListView-class.html
[`Opacity`]: https://api.flutter-io.cn/flutter/widgets/Opacity-class.html
[`Row`]: https://api.flutter-io.cn/flutter/widgets/Row-class.html
[`Text`]: https://api.flutter-io.cn/flutter/widgets/Text-class.html
[`Transform`]: https://api.flutter-io.cn/flutter/widgets/Transform-class.html
## Examples
## 样例
For an interactive experience, use the following DartPad.
Use the numbered horizontal scrolling bar to switch between
29 different examples.
下面的示例由 DartPad 提供,具有良好的交互体验。
使用下面水平滚动条的编号切换 29 个不同的示例。
```dartpad title="Constraints DartPad hands-on example" run="true"
import 'package:flutter/material.dart';
void main() => runApp(const HomePage());
const Color red = Colors.red;
const Color green = Colors.green;
const Color blue = Colors.blue;
const TextStyle big = TextStyle(fontSize: 30);
//////////////////////////////////////////////////
class HomePage extends StatelessWidget {
const HomePage({super.key});
@override
Widget build(BuildContext context) {
return const FlutterLayoutArticle([
Example1(),
Example2(),
Example3(),
Example4(),
Example5(),
Example6(),
Example7(),
Example8(),
Example9(),
Example10(),
Example11(),
Example12(),
Example13(),
Example14(),
Example15(),
Example16(),
Example17(),
Example18(),
Example19(),
Example20(),
Example21(),
Example22(),
Example23(),
Example24(),
Example25(),
Example26(),
Example27(),
Example28(),
Example29(),
]);
}
}
//////////////////////////////////////////////////
abstract class Example extends StatelessWidget {
const Example({super.key});
String get code;
String get explanation;
}
//////////////////////////////////////////////////
class FlutterLayoutArticle extends StatefulWidget {
const FlutterLayoutArticle(this.examples, {super.key});
final List examples;
@override
State createState() => _FlutterLayoutArticleState();
}
//////////////////////////////////////////////////
class _FlutterLayoutArticleState extends State {
late int count;
late Widget example;
late String code;
late String explanation;
@override
void initState() {
count = 1;
code = const Example1().code;
explanation = const Example1().explanation;
super.initState();
}
@override
void didUpdateWidget(FlutterLayoutArticle oldWidget) {
super.didUpdateWidget(oldWidget);
var example = widget.examples[count - 1];
code = example.code;
explanation = example.explanation;
}
@override
Widget build(BuildContext context) {
return MaterialApp(
debugShowCheckedModeBanner: false,
title: 'Flutter Layout Article',
home: SafeArea(
child: Material(
color: Colors.black,
child: FittedBox(
child: Container(
width: 400,
height: 670,
color: const Color(0xFFCCCCCC),
child: Column(
crossAxisAlignment: CrossAxisAlignment.center,
children: [
Expanded(
child: ConstrainedBox(
constraints: const BoxConstraints.tightFor(
width: double.infinity,
height: double.infinity,
),
child: widget.examples[count - 1],
),
),
Container(
height: 50,
width: double.infinity,
color: Colors.black,
child: SingleChildScrollView(
scrollDirection: Axis.horizontal,
child: Row(
mainAxisSize: MainAxisSize.min,
children: [
for (int i = 0; i < widget.examples.length; i++)
Container(
width: 58,
padding: const EdgeInsets.only(left: 4, right: 4),
child: button(i + 1),
),
],
),
),
),
Container(
height: 273,
color: Colors.grey[50],
child: Scrollbar(
child: SingleChildScrollView(
key: ValueKey(count),
child: Padding(
padding: const EdgeInsets.all(10),
child: Column(
children: [
Center(child: Text(code)),
const SizedBox(height: 15),
Text(
explanation,
style: TextStyle(
color: Colors.blue[900],
fontStyle: FontStyle.italic,
),
),
],
),
),
),
),
),
],
),
),
),
),
),
);
}
Widget button(int exampleNumber) {
return Button(
key: ValueKey('button$exampleNumber'),
isSelected: count == exampleNumber,
exampleNumber: exampleNumber,
onPressed: () {
showExample(
exampleNumber,
widget.examples[exampleNumber - 1].code,
widget.examples[exampleNumber - 1].explanation,
);
},
);
}
void showExample(int exampleNumber, String code, String explanation) {
setState(() {
count = exampleNumber;
this.code = code;
this.explanation = explanation;
});
}
}
//////////////////////////////////////////////////
class Button extends StatelessWidget {
final bool isSelected;
final int exampleNumber;
final VoidCallback onPressed;
const Button({
super.key,
required this.isSelected,
required this.exampleNumber,
required this.onPressed,
});
@override
Widget build(BuildContext context) {
return TextButton(
style: TextButton.styleFrom(
foregroundColor: Colors.white,
backgroundColor: isSelected ? Colors.grey : Colors.grey[800],
),
child: Text(exampleNumber.toString()),
onPressed: () {
Scrollable.ensureVisible(
context,
duration: const Duration(milliseconds: 350),
curve: Curves.easeOut,
alignment: 0.5,
);
onPressed();
},
);
}
}
//////////////////////////////////////////////////
class Example1 extends Example {
const Example1({super.key});
@override
final code = 'Container(color: red)';
@override
final explanation =
'The screen is the parent of the Container, '
'and it forces the Container to be exactly the same size as the screen.'
'\n\n'
'So the Container fills the screen and paints it red.';
@override
Widget build(BuildContext context) {
return Container(color: red);
}
}
//////////////////////////////////////////////////
class Example2 extends Example {
const Example2({super.key});
@override
final code = 'Container(width: 100, height: 100, color: red)';
@override
final String explanation =
'The red Container wants to be 100x100, but it can\'t, '
'because the screen forces it to be exactly the same size as the screen.'
'\n\n'
'So the Container fills the screen.';
@override
Widget build(BuildContext context) {
return Container(width: 100, height: 100, color: red);
}
}
//////////////////////////////////////////////////
class Example3 extends Example {
const Example3({super.key});
@override
final code =
'Center(\n'
' child: Container(width: 100, height: 100, color: red))';
@override
final String explanation =
'The screen forces the Center to be exactly the same size as the screen, '
'so the Center fills the screen.'
'\n\n'
'The Center tells the Container that it can be any size it wants, but not bigger than the screen.'
'Now the Container can indeed be 100x100.';
@override
Widget build(BuildContext context) {
return Center(child: Container(width: 100, height: 100, color: red));
}
}
//////////////////////////////////////////////////
class Example4 extends Example {
const Example4({super.key});
@override
final code =
'Align(\n'
' alignment: Alignment.bottomRight,\n'
' child: Container(width: 100, height: 100, color: red))';
@override
final String explanation =
'This is different from the previous example in that it uses Align instead of Center.'
'\n\n'
'Align also tells the Container that it can be any size it wants, but if there is empty space it won\'t center the Container. '
'Instead, it aligns the Container to the bottom-right of the available space.';
@override
Widget build(BuildContext context) {
return Align(
alignment: Alignment.bottomRight,
child: Container(width: 100, height: 100, color: red),
);
}
}
//////////////////////////////////////////////////
class Example5 extends Example {
const Example5({super.key});
@override
final code =
'Center(\n'
' child: Container(\n'
' color: red,\n'
' width: double.infinity,\n'
' height: double.infinity))';
@override
final String explanation =
'The screen forces the Center to be exactly the same size as the screen, '
'so the Center fills the screen.'
'\n\n'
'The Center tells the Container that it can be any size it wants, but not bigger than the screen.'
'The Container wants to be of infinite size, but since it can\'t be bigger than the screen, it just fills the screen.';
@override
Widget build(BuildContext context) {
return Center(
child: Container(
width: double.infinity,
height: double.infinity,
color: red,
),
);
}
}
//////////////////////////////////////////////////
class Example6 extends Example {
const Example6({super.key});
@override
final code = 'Center(child: Container(color: red))';
@override
final String explanation =
'The screen forces the Center to be exactly the same size as the screen, '
'so the Center fills the screen.'
'\n\n'
'The Center tells the Container that it can be any size it wants, but not bigger than the screen.'
'\n\n'
'Since the Container has no child and no fixed size, it decides it wants to be as big as possible, so it fills the whole screen.'
'\n\n'
'But why does the Container decide that? '
'Simply because that\'s a design decision by those who created the Container widget. '
'It could have been created differently, and you have to read the Container documentation to understand how it behaves, depending on the circumstances. ';
@override
Widget build(BuildContext context) {
return Center(child: Container(color: red));
}
}
//////////////////////////////////////////////////
class Example7 extends Example {
const Example7({super.key});
@override
final code =
'Center(\n'
' child: Container(color: red\n'
' child: Container(color: green, width: 30, height: 30)))';
@override
final String explanation =
'The screen forces the Center to be exactly the same size as the screen, '
'so the Center fills the screen.'
'\n\n'
'The Center tells the red Container that it can be any size it wants, but not bigger than the screen.'
'Since the red Container has no size but has a child, it decides it wants to be the same size as its child.'
'\n\n'
'The red Container tells its child that it can be any size it wants, but not bigger than the screen.'
'\n\n'
'The child is a green Container that wants to be 30x30.'
'\n\n'
'Since the red `Container` has no size but has a child, it decides it wants to be the same size as its child. '
'The red color isn\'t visible, since the green Container entirely covers all of the red Container.';
@override
Widget build(BuildContext context) {
return Center(
child: Container(
color: red,
child: Container(color: green, width: 30, height: 30),
),
);
}
}
//////////////////////////////////////////////////
class Example8 extends Example {
const Example8({super.key});
@override
final code =
'Center(\n'
' child: Container(color: red\n'
' padding: const EdgeInsets.all(20),\n'
' child: Container(color: green, width: 30, height: 30)))';
@override
final String explanation =
'The red Container sizes itself to its children size, but it takes its own padding into consideration. '
'So it is also 30x30 plus padding. '
'The red color is visible because of the padding, and the green Container has the same size as in the previous example.';
@override
Widget build(BuildContext context) {
return Center(
child: Container(
padding: const EdgeInsets.all(20),
color: red,
child: Container(color: green, width: 30, height: 30),
),
);
}
}
//////////////////////////////////////////////////
class Example9 extends Example {
const Example9({super.key});
@override
final code =
'ConstrainedBox(\n'
' constraints: BoxConstraints(\n'
' minWidth: 70, minHeight: 70,\n'
' maxWidth: 150, maxHeight: 150),\n'
' child: Container(color: red, width: 10, height: 10)))';
@override
final String explanation =
'You might guess that the Container has to be between 70 and 150 pixels, but you would be wrong. '
'The ConstrainedBox only imposes ADDITIONAL constraints from those it receives from its parent.'
'\n\n'
'Here, the screen forces the ConstrainedBox to be exactly the same size as the screen, '
'so it tells its child Container to also assume the size of the screen, '
'thus ignoring its \'constraints\' parameter.';
@override
Widget build(BuildContext context) {
return ConstrainedBox(
constraints: const BoxConstraints(
minWidth: 70,
minHeight: 70,
maxWidth: 150,
maxHeight: 150,
),
child: Container(color: red, width: 10, height: 10),
);
}
}
//////////////////////////////////////////////////
class Example10 extends Example {
const Example10({super.key});
@override
final code =
'Center(\n'
' child: ConstrainedBox(\n'
' constraints: BoxConstraints(\n'
' minWidth: 70, minHeight: 70,\n'
' maxWidth: 150, maxHeight: 150),\n'
' child: Container(color: red, width: 10, height: 10))))';
@override
final String explanation =
'Now, Center allows ConstrainedBox to be any size up to the screen size.'
'\n\n'
'The ConstrainedBox imposes ADDITIONAL constraints from its \'constraints\' parameter onto its child.'
'\n\n'
'The Container must be between 70 and 150 pixels. It wants to have 10 pixels, so it will end up having 70 (the MINIMUM).';
@override
Widget build(BuildContext context) {
return Center(
child: ConstrainedBox(
constraints: const BoxConstraints(
minWidth: 70,
minHeight: 70,
maxWidth: 150,
maxHeight: 150,
),
child: Container(color: red, width: 10, height: 10),
),
);
}
}
//////////////////////////////////////////////////
class Example11 extends Example {
const Example11({super.key});
@override
final code =
'Center(\n'
' child: ConstrainedBox(\n'
' constraints: BoxConstraints(\n'
' minWidth: 70, minHeight: 70,\n'
' maxWidth: 150, maxHeight: 150),\n'
' child: Container(color: red, width: 1000, height: 1000))))';
@override
final String explanation =
'Center allows ConstrainedBox to be any size up to the screen size.'
'The ConstrainedBox imposes ADDITIONAL constraints from its \'constraints\' parameter onto its child'
'\n\n'
'The Container must be between 70 and 150 pixels. It wants to have 1000 pixels, so it ends up having 150 (the MAXIMUM).';
@override
Widget build(BuildContext context) {
return Center(
child: ConstrainedBox(
constraints: const BoxConstraints(
minWidth: 70,
minHeight: 70,
maxWidth: 150,
maxHeight: 150,
),
child: Container(color: red, width: 1000, height: 1000),
),
);
}
}
//////////////////////////////////////////////////
class Example12 extends Example {
const Example12({super.key});
@override
final code =
'Center(\n'
' child: ConstrainedBox(\n'
' constraints: BoxConstraints(\n'
' minWidth: 70, minHeight: 70,\n'
' maxWidth: 150, maxHeight: 150),\n'
' child: Container(color: red, width: 100, height: 100))))';
@override
final String explanation =
'Center allows ConstrainedBox to be any size up to the screen size.'
'ConstrainedBox imposes ADDITIONAL constraints from its \'constraints\' parameter onto its child.'
'\n\n'
'The Container must be between 70 and 150 pixels. It wants to have 100 pixels, and that\'s the size it has, since that\'s between 70 and 150.';
@override
Widget build(BuildContext context) {
return Center(
child: ConstrainedBox(
constraints: const BoxConstraints(
minWidth: 70,
minHeight: 70,
maxWidth: 150,
maxHeight: 150,
),
child: Container(color: red, width: 100, height: 100),
),
);
}
}
//////////////////////////////////////////////////
class Example13 extends Example {
const Example13({super.key});
@override
final code =
'UnconstrainedBox(\n'
' child: Container(color: red, width: 20, height: 50));';
@override
final String explanation =
'The screen forces the UnconstrainedBox to be exactly the same size as the screen.'
'However, the UnconstrainedBox lets its child Container be any size it wants.';
@override
Widget build(BuildContext context) {
return UnconstrainedBox(
child: Container(color: red, width: 20, height: 50),
);
}
}
//////////////////////////////////////////////////
class Example14 extends Example {
const Example14({super.key});
@override
final code =
'UnconstrainedBox(\n'
' child: Container(color: red, width: 4000, height: 50));';
@override
final String explanation =
'The screen forces the UnconstrainedBox to be exactly the same size as the screen, '
'and UnconstrainedBox lets its child Container be any size it wants.'
'\n\n'
'Unfortunately, in this case the Container has 4000 pixels of width and is too big to fit in the UnconstrainedBox, '
'so the UnconstrainedBox displays the much dreaded "overflow warning".';
@override
Widget build(BuildContext context) {
return UnconstrainedBox(
child: Container(color: red, width: 4000, height: 50),
);
}
}
//////////////////////////////////////////////////
class Example15 extends Example {
const Example15({super.key});
@override
final code =
'OverflowBox(\n'
' minWidth: 0,'
' minHeight: 0,'
' maxWidth: double.infinity,'
' maxHeight: double.infinity,'
' child: Container(color: red, width: 4000, height: 50));';
@override
final String explanation =
'The screen forces the OverflowBox to be exactly the same size as the screen, '
'and OverflowBox lets its child Container be any size it wants.'
'\n\n'
'OverflowBox is similar to UnconstrainedBox, and the difference is that it won\'t display any warnings if the child doesn\'t fit the space.'
'\n\n'
'In this case the Container is 4000 pixels wide, and is too big to fit in the OverflowBox, '
'but the OverflowBox simply shows as much as it can, with no warnings given.';
@override
Widget build(BuildContext context) {
return OverflowBox(
minWidth: 0,
minHeight: 0,
maxWidth: double.infinity,
maxHeight: double.infinity,
child: Container(color: red, width: 4000, height: 50),
);
}
}
//////////////////////////////////////////////////
class Example16 extends Example {
const Example16({super.key});
@override
final code =
'UnconstrainedBox(\n'
' child: Container(color: Colors.red, width: double.infinity, height: 100));';
@override
final String explanation =
'This won\'t render anything, and you\'ll see an error in the console.'
'\n\n'
'The UnconstrainedBox lets its child be any size it wants, '
'however its child is a Container with infinite size.'
'\n\n'
'Flutter can\'t render infinite sizes, so it throws an error with the following message: '
'"BoxConstraints forces an infinite width."';
@override
Widget build(BuildContext context) {
return UnconstrainedBox(
child: Container(color: Colors.red, width: double.infinity, height: 100),
);
}
}
//////////////////////////////////////////////////
class Example17 extends Example {
const Example17({super.key});
@override
final code =
'UnconstrainedBox(\n'
' child: LimitedBox(maxWidth: 100,\n'
' child: Container(color: Colors.red,\n'
' width: double.infinity, height: 100));';
@override
final String explanation =
'Here you won\'t get an error anymore, '
'because when the LimitedBox is given an infinite size by the UnconstrainedBox, '
'it passes a maximum width of 100 down to its child.'
'\n\n'
'If you swap the UnconstrainedBox for a Center widget, '
'the LimitedBox won\'t apply its limit anymore (since its limit is only applied when it gets infinite constraints), '
'and the width of the Container is allowed to grow past 100.'
'\n\n'
'This explains the difference between a LimitedBox and a ConstrainedBox.';
@override
Widget build(BuildContext context) {
return UnconstrainedBox(
child: LimitedBox(
maxWidth: 100,
child: Container(
color: Colors.red,
width: double.infinity,
height: 100,
),
),
);
}
}
//////////////////////////////////////////////////
class Example18 extends Example {
const Example18({super.key});
@override
final code =
'FittedBox(\n'
' child: Text(\'Some Example Text.\'));';
@override
final String explanation =
'The screen forces the FittedBox to be exactly the same size as the screen.'
'The Text has some natural width (also called its intrinsic width) that depends on the amount of text, its font size, and so on.'
'\n\n'
'The FittedBox lets the Text be any size it wants, '
'but after the Text tells its size to the FittedBox, '
'the FittedBox scales the Text until it fills all of the available width.';
@override
Widget build(BuildContext context) {
return const FittedBox(child: Text('Some Example Text.'));
}
}
//////////////////////////////////////////////////
class Example19 extends Example {
const Example19({super.key});
@override
final code =
'Center(\n'
' child: FittedBox(\n'
' child: Text(\'Some Example Text.\')));';
@override
final String explanation =
'But what happens if you put the FittedBox inside of a Center widget? '
'The Center lets the FittedBox be any size it wants, up to the screen size.'
'\n\n'
'The FittedBox then sizes itself to the Text, and lets the Text be any size it wants.'
'\n\n'
'Since both FittedBox and the Text have the same size, no scaling happens.';
@override
Widget build(BuildContext context) {
return const Center(child: FittedBox(child: Text('Some Example Text.')));
}
}
////////////////////////////////////////////////////
class Example20 extends Example {
const Example20({super.key});
@override
final code =
'Center(\n'
' child: FittedBox(\n'
' child: Text(\'…\')));';
@override
final String explanation =
'However, what happens if FittedBox is inside of a Center widget, but the Text is too large to fit the screen?'
'\n\n'
'FittedBox tries to size itself to the Text, but it can\'t be bigger than the screen. '
'It then assumes the screen size, and resizes Text so that it fits the screen, too.';
@override
Widget build(BuildContext context) {
return const Center(
child: FittedBox(
child: Text(
'This is some very very very large text that is too big to fit a regular screen in a single line.',
),
),
);
}
}
//////////////////////////////////////////////////
class Example21 extends Example {
const Example21({super.key});
@override
final code =
'Center(\n'
' child: Text(\'…\'));';
@override
final String explanation =
'If, however, you remove the FittedBox, '
'the Text gets its maximum width from the screen, '
'and breaks the line so that it fits the screen.';
@override
Widget build(BuildContext context) {
return const Center(
child: Text(
'This is some very very very large text that is too big to fit a regular screen in a single line.',
),
);
}
}
//////////////////////////////////////////////////
class Example22 extends Example {
const Example22({super.key});
@override
final code =
'FittedBox(\n'
' child: Container(\n'
' height: 20, width: double.infinity));';
@override
final String explanation =
'FittedBox can only scale a widget that is BOUNDED (has non-infinite width and height).'
'Otherwise, it won\'t render anything, and you\'ll see an error in the console.';
@override
Widget build(BuildContext context) {
return FittedBox(
child: Container(height: 20, width: double.infinity, color: Colors.red),
);
}
}
//////////////////////////////////////////////////
class Example23 extends Example {
const Example23({super.key});
@override
final code =
'Row(children:[\n'
' Container(color: red, child: Text(\'Hello!\'))\n'
' Container(color: green, child: Text(\'Goodbye!\'))]';
@override
final String explanation =
'The screen forces the Row to be exactly the same size as the screen.'
'\n\n'
'Just like an UnconstrainedBox, the Row won\'t impose any constraints onto its children, '
'and instead lets them be any size they want.'
'\n\n'
'The Row then puts them side-by-side, and any extra space remains empty.';
@override
Widget build(BuildContext context) {
return Row(
children: [
Container(
color: red,
child: const Text('Hello!', style: big),
),
Container(
color: green,
child: const Text('Goodbye!', style: big),
),
],
);
}
}
//////////////////////////////////////////////////
class Example24 extends Example {
const Example24({super.key});
@override
final code =
'Row(children:[\n'
' Container(color: red, child: Text(\'…\'))\n'
' Container(color: green, child: Text(\'Goodbye!\'))]';
@override
final String explanation =
'Since the Row won\'t impose any constraints onto its children, '
'it\'s quite possible that the children might be too big to fit the available width of the Row.'
'In this case, just like an UnconstrainedBox, the Row displays the "overflow warning".';
@override
Widget build(BuildContext context) {
return Row(
children: [
Container(
color: red,
child: const Text(
'This is a very long text that '
'won\'t fit the line.',
style: big,
),
),
Container(
color: green,
child: const Text('Goodbye!', style: big),
),
],
);
}
}
//////////////////////////////////////////////////
class Example25 extends Example {
const Example25({super.key});
@override
final code =
'Row(children:[\n'
' Expanded(\n'
' child: Container(color: red, child: Text(\'…\')))\n'
' Container(color: green, child: Text(\'Goodbye!\'))]';
@override
final String explanation =
'When a Row\'s child is wrapped in an Expanded widget, the Row won\'t let this child define its own width anymore.'
'\n\n'
'Instead, it defines the Expanded width according to the other children, and only then the Expanded widget forces the original child to have the Expanded\'s width.'
'\n\n'
'In other words, once you use Expanded, the original child\'s width becomes irrelevant, and is ignored.';
@override
Widget build(BuildContext context) {
return Row(
children: [
Expanded(
child: Center(
child: Container(
color: red,
child: const Text(
'This is a very long text that won\'t fit the line.',
style: big,
),
),
),
),
Container(
color: green,
child: const Text('Goodbye!', style: big),
),
],
);
}
}
//////////////////////////////////////////////////
class Example26 extends Example {
const Example26({super.key});
@override
final code =
'Row(children:[\n'
' Expanded(\n'
' child: Container(color: red, child: Text(\'…\')))\n'
' Expanded(\n'
' child: Container(color: green, child: Text(\'Goodbye!\'))]';
@override
final String explanation =
'If all of Row\'s children are wrapped in Expanded widgets, each Expanded has a size proportional to its flex parameter, '
'and only then each Expanded widget forces its child to have the Expanded\'s width.'
'\n\n'
'In other words, Expanded ignores the preferred width of its children.';
@override
Widget build(BuildContext context) {
return Row(
children: [
Expanded(
child: Container(
color: red,
child: const Text(
'This is a very long text that won\'t fit the line.',
style: big,
),
),
),
Expanded(
child: Container(
color: green,
child: const Text('Goodbye!', style: big),
),
),
],
);
}
}
//////////////////////////////////////////////////
class Example27 extends Example {
const Example27({super.key});
@override
final code =
'Row(children:[\n'
' Flexible(\n'
' child: Container(color: red, child: Text(\'…\')))\n'
' Flexible(\n'
' child: Container(color: green, child: Text(\'Goodbye!\'))]';
@override
final String explanation =
'The only difference if you use Flexible instead of Expanded, '
'is that Flexible lets its child be SMALLER than the Flexible width, '
'while Expanded forces its child to have the same width of the Expanded.'
'\n\n'
'But both Expanded and Flexible ignore their children\'s width when sizing themselves.'
'\n\n'
'This means that it\'s IMPOSSIBLE to expand Row children proportionally to their sizes. '
'The Row either uses the exact child\'s width, or ignores it completely when you use Expanded or Flexible.';
@override
Widget build(BuildContext context) {
return Row(
children: [
Flexible(
child: Container(
color: red,
child: const Text(
'This is a very long text that won\'t fit the line.',
style: big,
),
),
),
Flexible(
child: Container(
color: green,
child: const Text('Goodbye!', style: big),
),
),
],
);
}
}
//////////////////////////////////////////////////
class Example28 extends Example {
const Example28({super.key});
@override
final code =
'Scaffold(\n'
' body: Container(color: blue,\n'
' child: Column(\n'
' children: [\n'
' Text(\'Hello!\'),\n'
' Text(\'Goodbye!\')])))';
@override
final String explanation =
'The screen forces the Scaffold to be exactly the same size as the screen, '
'so the Scaffold fills the screen.'
'\n\n'
'The Scaffold tells the Container that it can be any size it wants, but not bigger than the screen.'
'\n\n'
'When a widget tells its child that it can be smaller than a certain size, '
'we say the widget supplies "loose" constraints to its child. More on that later.';
@override
Widget build(BuildContext context) {
return Scaffold(
body: Container(
color: blue,
child: const Column(children: [Text('Hello!'), Text('Goodbye!')]),
),
);
}
}
//////////////////////////////////////////////////
class Example29 extends Example {
const Example29({super.key});
@override
final code =
'Scaffold(\n'
' body: Container(color: blue,\n'
' child: SizedBox.expand(\n'
' child: Column(\n'
' children: [\n'
' Text(\'Hello!\'),\n'
' Text(\'Goodbye!\')]))))';
@override
final String explanation =
'If you want the Scaffold\'s child to be exactly the same size as the Scaffold itself, '
'you can wrap its child with SizedBox.expand.'
'\n\n'
'When a widget tells its child that it must be of a certain size, '
'we say the widget supplies "tight" constraints to its child. More on that later.';
@override
Widget build(BuildContext context) {
return Scaffold(
body: SizedBox.expand(
child: Container(
color: blue,
child: const Column(children: [Text('Hello!'), Text('Goodbye!')]),
),
),
);
}
}
//////////////////////////////////////////////////
```
If you prefer, you can grab the code from
[this GitHub repo][].
如果你愿意的话,你还可以在
[这个 Github 仓库中][this GitHub repo] 获取其代码。
The examples are explained in the following sections.
以下各节将介绍这些示例。
[this GitHub repo]: https://github.com/marcglasberg/flutter_layout_article
### Example 1
### 样例 1
The negotiation goes something like this:
那么谈判将会像这样:
**Widget**: "Hey parent, what are my constraints?"
**Widget**: "嘿!我的父级。我的约束是多少?"
**Parent**: "You must be from `0` to `300` pixels wide,
and `0` to `85` tall."
**Parent**: "你的宽度必须在 `0` 到 `300` 像素之间,高度必须在 `0` 到 `85` 之间。"
**Widget**: "Hmmm, since I want to have `5` pixels of padding,
then my children can have at most `290` pixels of width
and `75` pixels of height."
**Widget**: "嗯...我想要 `5` 个像素的内边距,这样我的子级能最多拥有 `290` 个像素宽度和 `75` 个像素高度。"
**Widget**: "Hey first child, You must be from `0` to `290`
pixels wide, and `0` to `75` tall."
**Widget**: "嘿,我的第一个子级,你的宽度必须要在 `0` 到 `290`,长度在 `0` 到 `75` 之间。"
**First child**: "OK, then I wish to be `290` pixels wide,
and `20` pixels tall."
**First child**: "OK,那我想要 `290` 像素的宽度,`20` 个像素的长度。"
**Widget**: "Hmmm, since I want to put my second child below the
first one, this leaves only `55` pixels of height for
my second child."
**Widget**: "嗯...由于我想要将我的第二个子级放在第一个子级下面,所以我们仅剩 `55` 个像素的高度给第二个子级了。"
**Widget**: "Hey second child, You must be from `0` to `290` wide,
and `0` to `55` tall."
**Widget**: "嘿,我的第二个子级,你的宽度必须要在 `0` 到 `290`,长度在 `0` 到 `55` 之间。"
**Second child**: "OK, I wish to be `140` pixels wide,
and `30` pixels tall."
**Second child**: "OK,那我想要 `140` 像素的宽度,`30` 个像素的长度。"
**Widget**: "Very well. My first child has position `x: 5` and `y: 5`,
and my second child has `x: 80` and `y: 25`."
**Widget**: "很好。我的第一个子级将被放在 `x: 5` & `y: 5` 的位置,
而我的第二个子级将在 `x: 80` & `y: 25` 的位置。"
**Widget**: "Hey parent, I've decided that my size is going to be `300`
pixels wide, and `60` pixels tall."
**Widget**: "嘿,我的父级,我决定我的大小为 `300` 像素宽度,`60` 像素高度。"
## Limitations
## 限制
Flutter's layout engine is designed to be a one-pass process.
This means that Flutter lays out its widgets very efficiently,
but does result in a few limitations:
Flutter 的布局引擎的设计初衷是可以一次性完成整个布局的构建。
这使得它非常高效,但同时会有一些限制:
* A widget can decide its own size only within the
constraints given to it by its parent.
This means a widget usually
**can't have any size it wants**.
一个 widget 仅在其父级给其约束的情况下才能决定自身的大小。
这意味着 widget 通常情况下 **不能任意获得其想要的大小**。
* A widget **can't know and doesn't decide its own position
in the screen**, since it's the widget's parent who decides
the position of the widget.
一个 widget **无法知道,也不需要决定其在屏幕中的位置**。
因为它的位置是由其父级决定的。
* Since the parent's size and position, in its turn,
also depends on its own parent, it's impossible to
precisely define the size and position of any widget
without taking into consideration the tree as a whole.
当轮到父级决定其大小和位置的时候,同样的也取决于它自身的父级。
所以,在不考虑整棵树的情况下,几乎不可能精确定义任何 widget 的大小和位置。
* If a child wants a different size from its parent and
the parent doesn't have enough information to align it,
then the child's size might be ignored.
**Be specific when defining alignment.**
如果子级想要拥有和父级不同的大小,然而父级没有足够的空间对其进行布局的话,
子级的设置的大小可能会不生效。
**这时请明确指定它的对齐方式**
In Flutter, widgets are rendered by their underlying
[`RenderBox`][] objects. Many boxes in Flutter,
especially those that just take a single child,
pass their constraint on to their children.
在 Flutter 世界中,widget 是由它们的 [`RenderBox`][] 对象进行实际渲染的。
大部分特别是只有一个子节点的 box 会直接将限制传递下去。
Generally, there are three kinds of boxes,
in terms of how they handle their constraints:
总的来说,box 分成以下几类,它们有不同的处理大小限制的方式:
* Those that try to be as big as possible.
For example, the boxes used by [`Center`][] and
[`ListView`][].
尽可能地撑满。例如 [`Center`][] 和 [`ListView`][] 使用的 box。
* Those that try to be the same size as their children.
For example, the boxes used by [`Transform`][] and
[`Opacity`][].
尽可能地保持与子节点一致。例如 [`Transform`][] 和 [`Opacity`][] 使用的 box。
* Those that try to be a particular size.
For example, the boxes used by [`Image`][] and
[`Text`][].
尽可能地布局为指定大小。例如 [`Image`][] 和 [`Text`][] 使用的 box。
Some widgets, for example [`Container`][],
vary from type to type based on their constructor arguments.
The [`Container`][] constructor defaults
to trying to be as big as possible, but if you give it a `width`,
for instance, it tries to honor that and be that particular size.
像 [`Container`][] 这样的 widget 会根据不同的参数进行不同的布局。
[`Container`][] 的默认构造会让其尽可能地撑满大小限制,
但如果你设置了 `width`,它就会尽可能地遵照你设置的大小。
Others, for example [`Row`][] and [`Column`][] (flex boxes)
vary based on the constraints they are given,
as described in the [Flex](#flex) section.
其他像 [`Row`][] 和 [`Column`][](Flex 系列)这样的 widget
会根据它们的限制进行不同的布局。在 [Flex](#flex) 小节中有更详细的描述。
[`Center`]: https://api.flutter-io.cn/flutter/widgets/Center-class.html
[`Column`]: https://api.flutter-io.cn/flutter/widgets/Column-class.html
[`Container`]: https://api.flutter-io.cn/flutter/widgets/Container-class.html
[`Image`]: https://api.flutter-io.cn/flutter/dart-ui/Image-class.html
[`ListView`]: https://api.flutter-io.cn/flutter/widgets/ListView-class.html
[`Opacity`]: https://api.flutter-io.cn/flutter/widgets/Opacity-class.html
[`Row`]: https://api.flutter-io.cn/flutter/widgets/Row-class.html
[`Text`]: https://api.flutter-io.cn/flutter/widgets/Text-class.html
[`Transform`]: https://api.flutter-io.cn/flutter/widgets/Transform-class.html
## Examples
## 样例
For an interactive experience, use the following DartPad.
Use the numbered horizontal scrolling bar to switch between
29 different examples.
下面的示例由 DartPad 提供,具有良好的交互体验。
使用下面水平滚动条的编号切换 29 个不同的示例。
```dartpad title="Constraints DartPad hands-on example" run="true"
import 'package:flutter/material.dart';
void main() => runApp(const HomePage());
const Color red = Colors.red;
const Color green = Colors.green;
const Color blue = Colors.blue;
const TextStyle big = TextStyle(fontSize: 30);
//////////////////////////////////////////////////
class HomePage extends StatelessWidget {
const HomePage({super.key});
@override
Widget build(BuildContext context) {
return const FlutterLayoutArticle([
Example1(),
Example2(),
Example3(),
Example4(),
Example5(),
Example6(),
Example7(),
Example8(),
Example9(),
Example10(),
Example11(),
Example12(),
Example13(),
Example14(),
Example15(),
Example16(),
Example17(),
Example18(),
Example19(),
Example20(),
Example21(),
Example22(),
Example23(),
Example24(),
Example25(),
Example26(),
Example27(),
Example28(),
Example29(),
]);
}
}
//////////////////////////////////////////////////
abstract class Example extends StatelessWidget {
const Example({super.key});
String get code;
String get explanation;
}
//////////////////////////////////////////////////
class FlutterLayoutArticle extends StatefulWidget {
const FlutterLayoutArticle(this.examples, {super.key});
final List examples;
@override
State createState() => _FlutterLayoutArticleState();
}
//////////////////////////////////////////////////
class _FlutterLayoutArticleState extends State {
late int count;
late Widget example;
late String code;
late String explanation;
@override
void initState() {
count = 1;
code = const Example1().code;
explanation = const Example1().explanation;
super.initState();
}
@override
void didUpdateWidget(FlutterLayoutArticle oldWidget) {
super.didUpdateWidget(oldWidget);
var example = widget.examples[count - 1];
code = example.code;
explanation = example.explanation;
}
@override
Widget build(BuildContext context) {
return MaterialApp(
debugShowCheckedModeBanner: false,
title: 'Flutter Layout Article',
home: SafeArea(
child: Material(
color: Colors.black,
child: FittedBox(
child: Container(
width: 400,
height: 670,
color: const Color(0xFFCCCCCC),
child: Column(
crossAxisAlignment: CrossAxisAlignment.center,
children: [
Expanded(
child: ConstrainedBox(
constraints: const BoxConstraints.tightFor(
width: double.infinity,
height: double.infinity,
),
child: widget.examples[count - 1],
),
),
Container(
height: 50,
width: double.infinity,
color: Colors.black,
child: SingleChildScrollView(
scrollDirection: Axis.horizontal,
child: Row(
mainAxisSize: MainAxisSize.min,
children: [
for (int i = 0; i < widget.examples.length; i++)
Container(
width: 58,
padding: const EdgeInsets.only(left: 4, right: 4),
child: button(i + 1),
),
],
),
),
),
Container(
height: 273,
color: Colors.grey[50],
child: Scrollbar(
child: SingleChildScrollView(
key: ValueKey(count),
child: Padding(
padding: const EdgeInsets.all(10),
child: Column(
children: [
Center(child: Text(code)),
const SizedBox(height: 15),
Text(
explanation,
style: TextStyle(
color: Colors.blue[900],
fontStyle: FontStyle.italic,
),
),
],
),
),
),
),
),
],
),
),
),
),
),
);
}
Widget button(int exampleNumber) {
return Button(
key: ValueKey('button$exampleNumber'),
isSelected: count == exampleNumber,
exampleNumber: exampleNumber,
onPressed: () {
showExample(
exampleNumber,
widget.examples[exampleNumber - 1].code,
widget.examples[exampleNumber - 1].explanation,
);
},
);
}
void showExample(int exampleNumber, String code, String explanation) {
setState(() {
count = exampleNumber;
this.code = code;
this.explanation = explanation;
});
}
}
//////////////////////////////////////////////////
class Button extends StatelessWidget {
final bool isSelected;
final int exampleNumber;
final VoidCallback onPressed;
const Button({
super.key,
required this.isSelected,
required this.exampleNumber,
required this.onPressed,
});
@override
Widget build(BuildContext context) {
return TextButton(
style: TextButton.styleFrom(
foregroundColor: Colors.white,
backgroundColor: isSelected ? Colors.grey : Colors.grey[800],
),
child: Text(exampleNumber.toString()),
onPressed: () {
Scrollable.ensureVisible(
context,
duration: const Duration(milliseconds: 350),
curve: Curves.easeOut,
alignment: 0.5,
);
onPressed();
},
);
}
}
//////////////////////////////////////////////////
class Example1 extends Example {
const Example1({super.key});
@override
final code = 'Container(color: red)';
@override
final explanation =
'The screen is the parent of the Container, '
'and it forces the Container to be exactly the same size as the screen.'
'\n\n'
'So the Container fills the screen and paints it red.';
@override
Widget build(BuildContext context) {
return Container(color: red);
}
}
//////////////////////////////////////////////////
class Example2 extends Example {
const Example2({super.key});
@override
final code = 'Container(width: 100, height: 100, color: red)';
@override
final String explanation =
'The red Container wants to be 100x100, but it can\'t, '
'because the screen forces it to be exactly the same size as the screen.'
'\n\n'
'So the Container fills the screen.';
@override
Widget build(BuildContext context) {
return Container(width: 100, height: 100, color: red);
}
}
//////////////////////////////////////////////////
class Example3 extends Example {
const Example3({super.key});
@override
final code =
'Center(\n'
' child: Container(width: 100, height: 100, color: red))';
@override
final String explanation =
'The screen forces the Center to be exactly the same size as the screen, '
'so the Center fills the screen.'
'\n\n'
'The Center tells the Container that it can be any size it wants, but not bigger than the screen.'
'Now the Container can indeed be 100x100.';
@override
Widget build(BuildContext context) {
return Center(child: Container(width: 100, height: 100, color: red));
}
}
//////////////////////////////////////////////////
class Example4 extends Example {
const Example4({super.key});
@override
final code =
'Align(\n'
' alignment: Alignment.bottomRight,\n'
' child: Container(width: 100, height: 100, color: red))';
@override
final String explanation =
'This is different from the previous example in that it uses Align instead of Center.'
'\n\n'
'Align also tells the Container that it can be any size it wants, but if there is empty space it won\'t center the Container. '
'Instead, it aligns the Container to the bottom-right of the available space.';
@override
Widget build(BuildContext context) {
return Align(
alignment: Alignment.bottomRight,
child: Container(width: 100, height: 100, color: red),
);
}
}
//////////////////////////////////////////////////
class Example5 extends Example {
const Example5({super.key});
@override
final code =
'Center(\n'
' child: Container(\n'
' color: red,\n'
' width: double.infinity,\n'
' height: double.infinity))';
@override
final String explanation =
'The screen forces the Center to be exactly the same size as the screen, '
'so the Center fills the screen.'
'\n\n'
'The Center tells the Container that it can be any size it wants, but not bigger than the screen.'
'The Container wants to be of infinite size, but since it can\'t be bigger than the screen, it just fills the screen.';
@override
Widget build(BuildContext context) {
return Center(
child: Container(
width: double.infinity,
height: double.infinity,
color: red,
),
);
}
}
//////////////////////////////////////////////////
class Example6 extends Example {
const Example6({super.key});
@override
final code = 'Center(child: Container(color: red))';
@override
final String explanation =
'The screen forces the Center to be exactly the same size as the screen, '
'so the Center fills the screen.'
'\n\n'
'The Center tells the Container that it can be any size it wants, but not bigger than the screen.'
'\n\n'
'Since the Container has no child and no fixed size, it decides it wants to be as big as possible, so it fills the whole screen.'
'\n\n'
'But why does the Container decide that? '
'Simply because that\'s a design decision by those who created the Container widget. '
'It could have been created differently, and you have to read the Container documentation to understand how it behaves, depending on the circumstances. ';
@override
Widget build(BuildContext context) {
return Center(child: Container(color: red));
}
}
//////////////////////////////////////////////////
class Example7 extends Example {
const Example7({super.key});
@override
final code =
'Center(\n'
' child: Container(color: red\n'
' child: Container(color: green, width: 30, height: 30)))';
@override
final String explanation =
'The screen forces the Center to be exactly the same size as the screen, '
'so the Center fills the screen.'
'\n\n'
'The Center tells the red Container that it can be any size it wants, but not bigger than the screen.'
'Since the red Container has no size but has a child, it decides it wants to be the same size as its child.'
'\n\n'
'The red Container tells its child that it can be any size it wants, but not bigger than the screen.'
'\n\n'
'The child is a green Container that wants to be 30x30.'
'\n\n'
'Since the red `Container` has no size but has a child, it decides it wants to be the same size as its child. '
'The red color isn\'t visible, since the green Container entirely covers all of the red Container.';
@override
Widget build(BuildContext context) {
return Center(
child: Container(
color: red,
child: Container(color: green, width: 30, height: 30),
),
);
}
}
//////////////////////////////////////////////////
class Example8 extends Example {
const Example8({super.key});
@override
final code =
'Center(\n'
' child: Container(color: red\n'
' padding: const EdgeInsets.all(20),\n'
' child: Container(color: green, width: 30, height: 30)))';
@override
final String explanation =
'The red Container sizes itself to its children size, but it takes its own padding into consideration. '
'So it is also 30x30 plus padding. '
'The red color is visible because of the padding, and the green Container has the same size as in the previous example.';
@override
Widget build(BuildContext context) {
return Center(
child: Container(
padding: const EdgeInsets.all(20),
color: red,
child: Container(color: green, width: 30, height: 30),
),
);
}
}
//////////////////////////////////////////////////
class Example9 extends Example {
const Example9({super.key});
@override
final code =
'ConstrainedBox(\n'
' constraints: BoxConstraints(\n'
' minWidth: 70, minHeight: 70,\n'
' maxWidth: 150, maxHeight: 150),\n'
' child: Container(color: red, width: 10, height: 10)))';
@override
final String explanation =
'You might guess that the Container has to be between 70 and 150 pixels, but you would be wrong. '
'The ConstrainedBox only imposes ADDITIONAL constraints from those it receives from its parent.'
'\n\n'
'Here, the screen forces the ConstrainedBox to be exactly the same size as the screen, '
'so it tells its child Container to also assume the size of the screen, '
'thus ignoring its \'constraints\' parameter.';
@override
Widget build(BuildContext context) {
return ConstrainedBox(
constraints: const BoxConstraints(
minWidth: 70,
minHeight: 70,
maxWidth: 150,
maxHeight: 150,
),
child: Container(color: red, width: 10, height: 10),
);
}
}
//////////////////////////////////////////////////
class Example10 extends Example {
const Example10({super.key});
@override
final code =
'Center(\n'
' child: ConstrainedBox(\n'
' constraints: BoxConstraints(\n'
' minWidth: 70, minHeight: 70,\n'
' maxWidth: 150, maxHeight: 150),\n'
' child: Container(color: red, width: 10, height: 10))))';
@override
final String explanation =
'Now, Center allows ConstrainedBox to be any size up to the screen size.'
'\n\n'
'The ConstrainedBox imposes ADDITIONAL constraints from its \'constraints\' parameter onto its child.'
'\n\n'
'The Container must be between 70 and 150 pixels. It wants to have 10 pixels, so it will end up having 70 (the MINIMUM).';
@override
Widget build(BuildContext context) {
return Center(
child: ConstrainedBox(
constraints: const BoxConstraints(
minWidth: 70,
minHeight: 70,
maxWidth: 150,
maxHeight: 150,
),
child: Container(color: red, width: 10, height: 10),
),
);
}
}
//////////////////////////////////////////////////
class Example11 extends Example {
const Example11({super.key});
@override
final code =
'Center(\n'
' child: ConstrainedBox(\n'
' constraints: BoxConstraints(\n'
' minWidth: 70, minHeight: 70,\n'
' maxWidth: 150, maxHeight: 150),\n'
' child: Container(color: red, width: 1000, height: 1000))))';
@override
final String explanation =
'Center allows ConstrainedBox to be any size up to the screen size.'
'The ConstrainedBox imposes ADDITIONAL constraints from its \'constraints\' parameter onto its child'
'\n\n'
'The Container must be between 70 and 150 pixels. It wants to have 1000 pixels, so it ends up having 150 (the MAXIMUM).';
@override
Widget build(BuildContext context) {
return Center(
child: ConstrainedBox(
constraints: const BoxConstraints(
minWidth: 70,
minHeight: 70,
maxWidth: 150,
maxHeight: 150,
),
child: Container(color: red, width: 1000, height: 1000),
),
);
}
}
//////////////////////////////////////////////////
class Example12 extends Example {
const Example12({super.key});
@override
final code =
'Center(\n'
' child: ConstrainedBox(\n'
' constraints: BoxConstraints(\n'
' minWidth: 70, minHeight: 70,\n'
' maxWidth: 150, maxHeight: 150),\n'
' child: Container(color: red, width: 100, height: 100))))';
@override
final String explanation =
'Center allows ConstrainedBox to be any size up to the screen size.'
'ConstrainedBox imposes ADDITIONAL constraints from its \'constraints\' parameter onto its child.'
'\n\n'
'The Container must be between 70 and 150 pixels. It wants to have 100 pixels, and that\'s the size it has, since that\'s between 70 and 150.';
@override
Widget build(BuildContext context) {
return Center(
child: ConstrainedBox(
constraints: const BoxConstraints(
minWidth: 70,
minHeight: 70,
maxWidth: 150,
maxHeight: 150,
),
child: Container(color: red, width: 100, height: 100),
),
);
}
}
//////////////////////////////////////////////////
class Example13 extends Example {
const Example13({super.key});
@override
final code =
'UnconstrainedBox(\n'
' child: Container(color: red, width: 20, height: 50));';
@override
final String explanation =
'The screen forces the UnconstrainedBox to be exactly the same size as the screen.'
'However, the UnconstrainedBox lets its child Container be any size it wants.';
@override
Widget build(BuildContext context) {
return UnconstrainedBox(
child: Container(color: red, width: 20, height: 50),
);
}
}
//////////////////////////////////////////////////
class Example14 extends Example {
const Example14({super.key});
@override
final code =
'UnconstrainedBox(\n'
' child: Container(color: red, width: 4000, height: 50));';
@override
final String explanation =
'The screen forces the UnconstrainedBox to be exactly the same size as the screen, '
'and UnconstrainedBox lets its child Container be any size it wants.'
'\n\n'
'Unfortunately, in this case the Container has 4000 pixels of width and is too big to fit in the UnconstrainedBox, '
'so the UnconstrainedBox displays the much dreaded "overflow warning".';
@override
Widget build(BuildContext context) {
return UnconstrainedBox(
child: Container(color: red, width: 4000, height: 50),
);
}
}
//////////////////////////////////////////////////
class Example15 extends Example {
const Example15({super.key});
@override
final code =
'OverflowBox(\n'
' minWidth: 0,'
' minHeight: 0,'
' maxWidth: double.infinity,'
' maxHeight: double.infinity,'
' child: Container(color: red, width: 4000, height: 50));';
@override
final String explanation =
'The screen forces the OverflowBox to be exactly the same size as the screen, '
'and OverflowBox lets its child Container be any size it wants.'
'\n\n'
'OverflowBox is similar to UnconstrainedBox, and the difference is that it won\'t display any warnings if the child doesn\'t fit the space.'
'\n\n'
'In this case the Container is 4000 pixels wide, and is too big to fit in the OverflowBox, '
'but the OverflowBox simply shows as much as it can, with no warnings given.';
@override
Widget build(BuildContext context) {
return OverflowBox(
minWidth: 0,
minHeight: 0,
maxWidth: double.infinity,
maxHeight: double.infinity,
child: Container(color: red, width: 4000, height: 50),
);
}
}
//////////////////////////////////////////////////
class Example16 extends Example {
const Example16({super.key});
@override
final code =
'UnconstrainedBox(\n'
' child: Container(color: Colors.red, width: double.infinity, height: 100));';
@override
final String explanation =
'This won\'t render anything, and you\'ll see an error in the console.'
'\n\n'
'The UnconstrainedBox lets its child be any size it wants, '
'however its child is a Container with infinite size.'
'\n\n'
'Flutter can\'t render infinite sizes, so it throws an error with the following message: '
'"BoxConstraints forces an infinite width."';
@override
Widget build(BuildContext context) {
return UnconstrainedBox(
child: Container(color: Colors.red, width: double.infinity, height: 100),
);
}
}
//////////////////////////////////////////////////
class Example17 extends Example {
const Example17({super.key});
@override
final code =
'UnconstrainedBox(\n'
' child: LimitedBox(maxWidth: 100,\n'
' child: Container(color: Colors.red,\n'
' width: double.infinity, height: 100));';
@override
final String explanation =
'Here you won\'t get an error anymore, '
'because when the LimitedBox is given an infinite size by the UnconstrainedBox, '
'it passes a maximum width of 100 down to its child.'
'\n\n'
'If you swap the UnconstrainedBox for a Center widget, '
'the LimitedBox won\'t apply its limit anymore (since its limit is only applied when it gets infinite constraints), '
'and the width of the Container is allowed to grow past 100.'
'\n\n'
'This explains the difference between a LimitedBox and a ConstrainedBox.';
@override
Widget build(BuildContext context) {
return UnconstrainedBox(
child: LimitedBox(
maxWidth: 100,
child: Container(
color: Colors.red,
width: double.infinity,
height: 100,
),
),
);
}
}
//////////////////////////////////////////////////
class Example18 extends Example {
const Example18({super.key});
@override
final code =
'FittedBox(\n'
' child: Text(\'Some Example Text.\'));';
@override
final String explanation =
'The screen forces the FittedBox to be exactly the same size as the screen.'
'The Text has some natural width (also called its intrinsic width) that depends on the amount of text, its font size, and so on.'
'\n\n'
'The FittedBox lets the Text be any size it wants, '
'but after the Text tells its size to the FittedBox, '
'the FittedBox scales the Text until it fills all of the available width.';
@override
Widget build(BuildContext context) {
return const FittedBox(child: Text('Some Example Text.'));
}
}
//////////////////////////////////////////////////
class Example19 extends Example {
const Example19({super.key});
@override
final code =
'Center(\n'
' child: FittedBox(\n'
' child: Text(\'Some Example Text.\')));';
@override
final String explanation =
'But what happens if you put the FittedBox inside of a Center widget? '
'The Center lets the FittedBox be any size it wants, up to the screen size.'
'\n\n'
'The FittedBox then sizes itself to the Text, and lets the Text be any size it wants.'
'\n\n'
'Since both FittedBox and the Text have the same size, no scaling happens.';
@override
Widget build(BuildContext context) {
return const Center(child: FittedBox(child: Text('Some Example Text.')));
}
}
////////////////////////////////////////////////////
class Example20 extends Example {
const Example20({super.key});
@override
final code =
'Center(\n'
' child: FittedBox(\n'
' child: Text(\'…\')));';
@override
final String explanation =
'However, what happens if FittedBox is inside of a Center widget, but the Text is too large to fit the screen?'
'\n\n'
'FittedBox tries to size itself to the Text, but it can\'t be bigger than the screen. '
'It then assumes the screen size, and resizes Text so that it fits the screen, too.';
@override
Widget build(BuildContext context) {
return const Center(
child: FittedBox(
child: Text(
'This is some very very very large text that is too big to fit a regular screen in a single line.',
),
),
);
}
}
//////////////////////////////////////////////////
class Example21 extends Example {
const Example21({super.key});
@override
final code =
'Center(\n'
' child: Text(\'…\'));';
@override
final String explanation =
'If, however, you remove the FittedBox, '
'the Text gets its maximum width from the screen, '
'and breaks the line so that it fits the screen.';
@override
Widget build(BuildContext context) {
return const Center(
child: Text(
'This is some very very very large text that is too big to fit a regular screen in a single line.',
),
);
}
}
//////////////////////////////////////////////////
class Example22 extends Example {
const Example22({super.key});
@override
final code =
'FittedBox(\n'
' child: Container(\n'
' height: 20, width: double.infinity));';
@override
final String explanation =
'FittedBox can only scale a widget that is BOUNDED (has non-infinite width and height).'
'Otherwise, it won\'t render anything, and you\'ll see an error in the console.';
@override
Widget build(BuildContext context) {
return FittedBox(
child: Container(height: 20, width: double.infinity, color: Colors.red),
);
}
}
//////////////////////////////////////////////////
class Example23 extends Example {
const Example23({super.key});
@override
final code =
'Row(children:[\n'
' Container(color: red, child: Text(\'Hello!\'))\n'
' Container(color: green, child: Text(\'Goodbye!\'))]';
@override
final String explanation =
'The screen forces the Row to be exactly the same size as the screen.'
'\n\n'
'Just like an UnconstrainedBox, the Row won\'t impose any constraints onto its children, '
'and instead lets them be any size they want.'
'\n\n'
'The Row then puts them side-by-side, and any extra space remains empty.';
@override
Widget build(BuildContext context) {
return Row(
children: [
Container(
color: red,
child: const Text('Hello!', style: big),
),
Container(
color: green,
child: const Text('Goodbye!', style: big),
),
],
);
}
}
//////////////////////////////////////////////////
class Example24 extends Example {
const Example24({super.key});
@override
final code =
'Row(children:[\n'
' Container(color: red, child: Text(\'…\'))\n'
' Container(color: green, child: Text(\'Goodbye!\'))]';
@override
final String explanation =
'Since the Row won\'t impose any constraints onto its children, '
'it\'s quite possible that the children might be too big to fit the available width of the Row.'
'In this case, just like an UnconstrainedBox, the Row displays the "overflow warning".';
@override
Widget build(BuildContext context) {
return Row(
children: [
Container(
color: red,
child: const Text(
'This is a very long text that '
'won\'t fit the line.',
style: big,
),
),
Container(
color: green,
child: const Text('Goodbye!', style: big),
),
],
);
}
}
//////////////////////////////////////////////////
class Example25 extends Example {
const Example25({super.key});
@override
final code =
'Row(children:[\n'
' Expanded(\n'
' child: Container(color: red, child: Text(\'…\')))\n'
' Container(color: green, child: Text(\'Goodbye!\'))]';
@override
final String explanation =
'When a Row\'s child is wrapped in an Expanded widget, the Row won\'t let this child define its own width anymore.'
'\n\n'
'Instead, it defines the Expanded width according to the other children, and only then the Expanded widget forces the original child to have the Expanded\'s width.'
'\n\n'
'In other words, once you use Expanded, the original child\'s width becomes irrelevant, and is ignored.';
@override
Widget build(BuildContext context) {
return Row(
children: [
Expanded(
child: Center(
child: Container(
color: red,
child: const Text(
'This is a very long text that won\'t fit the line.',
style: big,
),
),
),
),
Container(
color: green,
child: const Text('Goodbye!', style: big),
),
],
);
}
}
//////////////////////////////////////////////////
class Example26 extends Example {
const Example26({super.key});
@override
final code =
'Row(children:[\n'
' Expanded(\n'
' child: Container(color: red, child: Text(\'…\')))\n'
' Expanded(\n'
' child: Container(color: green, child: Text(\'Goodbye!\'))]';
@override
final String explanation =
'If all of Row\'s children are wrapped in Expanded widgets, each Expanded has a size proportional to its flex parameter, '
'and only then each Expanded widget forces its child to have the Expanded\'s width.'
'\n\n'
'In other words, Expanded ignores the preferred width of its children.';
@override
Widget build(BuildContext context) {
return Row(
children: [
Expanded(
child: Container(
color: red,
child: const Text(
'This is a very long text that won\'t fit the line.',
style: big,
),
),
),
Expanded(
child: Container(
color: green,
child: const Text('Goodbye!', style: big),
),
),
],
);
}
}
//////////////////////////////////////////////////
class Example27 extends Example {
const Example27({super.key});
@override
final code =
'Row(children:[\n'
' Flexible(\n'
' child: Container(color: red, child: Text(\'…\')))\n'
' Flexible(\n'
' child: Container(color: green, child: Text(\'Goodbye!\'))]';
@override
final String explanation =
'The only difference if you use Flexible instead of Expanded, '
'is that Flexible lets its child be SMALLER than the Flexible width, '
'while Expanded forces its child to have the same width of the Expanded.'
'\n\n'
'But both Expanded and Flexible ignore their children\'s width when sizing themselves.'
'\n\n'
'This means that it\'s IMPOSSIBLE to expand Row children proportionally to their sizes. '
'The Row either uses the exact child\'s width, or ignores it completely when you use Expanded or Flexible.';
@override
Widget build(BuildContext context) {
return Row(
children: [
Flexible(
child: Container(
color: red,
child: const Text(
'This is a very long text that won\'t fit the line.',
style: big,
),
),
),
Flexible(
child: Container(
color: green,
child: const Text('Goodbye!', style: big),
),
),
],
);
}
}
//////////////////////////////////////////////////
class Example28 extends Example {
const Example28({super.key});
@override
final code =
'Scaffold(\n'
' body: Container(color: blue,\n'
' child: Column(\n'
' children: [\n'
' Text(\'Hello!\'),\n'
' Text(\'Goodbye!\')])))';
@override
final String explanation =
'The screen forces the Scaffold to be exactly the same size as the screen, '
'so the Scaffold fills the screen.'
'\n\n'
'The Scaffold tells the Container that it can be any size it wants, but not bigger than the screen.'
'\n\n'
'When a widget tells its child that it can be smaller than a certain size, '
'we say the widget supplies "loose" constraints to its child. More on that later.';
@override
Widget build(BuildContext context) {
return Scaffold(
body: Container(
color: blue,
child: const Column(children: [Text('Hello!'), Text('Goodbye!')]),
),
);
}
}
//////////////////////////////////////////////////
class Example29 extends Example {
const Example29({super.key});
@override
final code =
'Scaffold(\n'
' body: Container(color: blue,\n'
' child: SizedBox.expand(\n'
' child: Column(\n'
' children: [\n'
' Text(\'Hello!\'),\n'
' Text(\'Goodbye!\')]))))';
@override
final String explanation =
'If you want the Scaffold\'s child to be exactly the same size as the Scaffold itself, '
'you can wrap its child with SizedBox.expand.'
'\n\n'
'When a widget tells its child that it must be of a certain size, '
'we say the widget supplies "tight" constraints to its child. More on that later.';
@override
Widget build(BuildContext context) {
return Scaffold(
body: SizedBox.expand(
child: Container(
color: blue,
child: const Column(children: [Text('Hello!'), Text('Goodbye!')]),
),
),
);
}
}
//////////////////////////////////////////////////
```
If you prefer, you can grab the code from
[this GitHub repo][].
如果你愿意的话,你还可以在
[这个 Github 仓库中][this GitHub repo] 获取其代码。
The examples are explained in the following sections.
以下各节将介绍这些示例。
[this GitHub repo]: https://github.com/marcglasberg/flutter_layout_article
### Example 1
### 样例 1
 ```dart
Container(color: red)
```
The screen is the parent of the `Container`, and it
forces the `Container` to be exactly the same size as the screen.
整个屏幕作为 `Container` 的父级,并且强制 `Container` 变成和屏幕一样的大小。
So the `Container` fills the screen and paints it red.
所以这个 `Container` 充满了整个屏幕,并绘制成红色。
### Example 2
### 样例 2
```dart
Container(color: red)
```
The screen is the parent of the `Container`, and it
forces the `Container` to be exactly the same size as the screen.
整个屏幕作为 `Container` 的父级,并且强制 `Container` 变成和屏幕一样的大小。
So the `Container` fills the screen and paints it red.
所以这个 `Container` 充满了整个屏幕,并绘制成红色。
### Example 2
### 样例 2
 ```dart
Container(width: 100, height: 100, color: red)
```
The red `Container` wants to be 100 × 100,
but it can't, because the screen forces it to be
exactly the same size as the screen.
红色的 `Container` 想要变成 100 x 100 的大小,
但是它无法变成,因为屏幕强制它变成和屏幕一样的大小。
So the `Container` fills the screen.
所以 `Container` 充满了整个屏幕。
### Example 3
### 样例 3
```dart
Container(width: 100, height: 100, color: red)
```
The red `Container` wants to be 100 × 100,
but it can't, because the screen forces it to be
exactly the same size as the screen.
红色的 `Container` 想要变成 100 x 100 的大小,
但是它无法变成,因为屏幕强制它变成和屏幕一样的大小。
So the `Container` fills the screen.
所以 `Container` 充满了整个屏幕。
### Example 3
### 样例 3
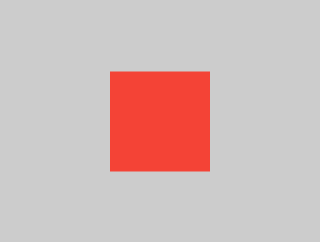 ```dart
Center(child: Container(width: 100, height: 100, color: red))
```
The screen forces the `Center` to be exactly the same size
as the screen, so the `Center` fills the screen.
屏幕强制 `Center` 变得和屏幕一样大,所以 `Center` 充满了屏幕。
The `Center` tells the `Container` that it can be any size it
wants, but not bigger than the screen. Now the `Container`
can indeed be 100 × 100.
然后 `Center` 告诉 `Container` 可以变成任意大小,但是不能超出屏幕。
现在,`Container` 可以真正变成 100 × 100 大小了。
### Example 4
### 样例 4
```dart
Center(child: Container(width: 100, height: 100, color: red))
```
The screen forces the `Center` to be exactly the same size
as the screen, so the `Center` fills the screen.
屏幕强制 `Center` 变得和屏幕一样大,所以 `Center` 充满了屏幕。
The `Center` tells the `Container` that it can be any size it
wants, but not bigger than the screen. Now the `Container`
can indeed be 100 × 100.
然后 `Center` 告诉 `Container` 可以变成任意大小,但是不能超出屏幕。
现在,`Container` 可以真正变成 100 × 100 大小了。
### Example 4
### 样例 4
 ```dart
Align(
alignment: Alignment.bottomRight,
child: Container(width: 100, height: 100, color: red),
)
```
This is different from the previous example in that it uses
`Align` instead of `Center`.
与上一个样例不同的是,我们使用了 `Align` 而不是 `Center`。
`Align` also tells the `Container` that it can be any size it
wants, but if there is empty space it won't center the `Container`.
Instead, it aligns the container to the bottom-right of the
available space.
`Align` 同样也告诉 `Container`,你可以变成任意大小。
但是,如果还留有空白空间的话,它不会居中 `Container`。
相反,它将会在允许的空间内,把 `Container` 放在右下角(bottomRight)。
### Example 5
### 样例 5
```dart
Align(
alignment: Alignment.bottomRight,
child: Container(width: 100, height: 100, color: red),
)
```
This is different from the previous example in that it uses
`Align` instead of `Center`.
与上一个样例不同的是,我们使用了 `Align` 而不是 `Center`。
`Align` also tells the `Container` that it can be any size it
wants, but if there is empty space it won't center the `Container`.
Instead, it aligns the container to the bottom-right of the
available space.
`Align` 同样也告诉 `Container`,你可以变成任意大小。
但是,如果还留有空白空间的话,它不会居中 `Container`。
相反,它将会在允许的空间内,把 `Container` 放在右下角(bottomRight)。
### Example 5
### 样例 5
 ```dart
Center(
child: Container(
width: double.infinity,
height: double.infinity,
color: red,
),
)
```
The screen forces the `Center` to be exactly the
same size as the screen, so the `Center` fills the screen.
屏幕强制 `Center` 变得和屏幕一样大,所以 `Center` 充满屏幕。
The `Center` tells the `Container` that it can be any size it wants,
but not bigger than the screen. The `Container` wants to be
of infinite size, but since it can't be bigger than the screen,
it just fills the screen.
然后 `Center` 告诉 `Container` 可以变成任意大小,但是不能超出屏幕。
现在,`Container` 想要无限的大小,但是由于它不能比屏幕更大,
所以就仅充满屏幕。
### Example 6
### 样例 6
```dart
Center(
child: Container(
width: double.infinity,
height: double.infinity,
color: red,
),
)
```
The screen forces the `Center` to be exactly the
same size as the screen, so the `Center` fills the screen.
屏幕强制 `Center` 变得和屏幕一样大,所以 `Center` 充满屏幕。
The `Center` tells the `Container` that it can be any size it wants,
but not bigger than the screen. The `Container` wants to be
of infinite size, but since it can't be bigger than the screen,
it just fills the screen.
然后 `Center` 告诉 `Container` 可以变成任意大小,但是不能超出屏幕。
现在,`Container` 想要无限的大小,但是由于它不能比屏幕更大,
所以就仅充满屏幕。
### Example 6
### 样例 6
 ```dart
Center(child: Container(color: red))
```
The screen forces the `Center` to be exactly the
same size as the screen, so the `Center` fills the screen.
屏幕强制 `Center` 变得和屏幕一样大,所以 `Center` 充满屏幕。
The `Center` tells the `Container` that it can be any
size it wants, but not bigger than the screen.
Since the `Container` has no child and no fixed size,
it decides it wants to be as big as possible,
so it fills the whole screen.
然后 `Center` 告诉 `Container` 可以变成任意大小,但是不能超出屏幕。
由于 `Container` 没有子级而且没有固定大小,所以它决定能有多大就有多大,
所以它充满了整个屏幕。
But why does the `Container` decide that?
Simply because that's a design decision by those who
created the `Container` widget. It could have been
created differently, and you have to read the
[`Container`][] API documentation to understand
how it behaves, depending on the circumstances.
但是,为什么 `Container` 做出了这个决定?
非常简单,因为这个决定是由 `Container` widget 的创建者决定的。
可能会因创造者而异,而且你还得阅读
[`Container`][] API 文档来理解不同场景下它的行为。
### Example 7
### 样例 7
```dart
Center(child: Container(color: red))
```
The screen forces the `Center` to be exactly the
same size as the screen, so the `Center` fills the screen.
屏幕强制 `Center` 变得和屏幕一样大,所以 `Center` 充满屏幕。
The `Center` tells the `Container` that it can be any
size it wants, but not bigger than the screen.
Since the `Container` has no child and no fixed size,
it decides it wants to be as big as possible,
so it fills the whole screen.
然后 `Center` 告诉 `Container` 可以变成任意大小,但是不能超出屏幕。
由于 `Container` 没有子级而且没有固定大小,所以它决定能有多大就有多大,
所以它充满了整个屏幕。
But why does the `Container` decide that?
Simply because that's a design decision by those who
created the `Container` widget. It could have been
created differently, and you have to read the
[`Container`][] API documentation to understand
how it behaves, depending on the circumstances.
但是,为什么 `Container` 做出了这个决定?
非常简单,因为这个决定是由 `Container` widget 的创建者决定的。
可能会因创造者而异,而且你还得阅读
[`Container`][] API 文档来理解不同场景下它的行为。
### Example 7
### 样例 7
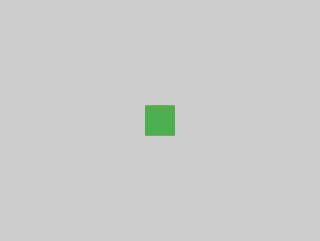 ```dart
Center(
child: Container(
color: red,
child: Container(color: green, width: 30, height: 30),
),
)
```
The screen forces the `Center` to be exactly the same
size as the screen, so the `Center` fills the screen.
屏幕强制 `Center` 变得和屏幕一样大,所以 `Center` 充满屏幕。
The `Center` tells the red `Container` that it can be any size
it wants, but not bigger than the screen. Since the red
`Container` has no size but has a child,
it decides it wants to be the same size as its child.
然后 `Center` 告诉红色的 `Container` 可以变成任意大小,但是不能超出屏幕。
由于 `Container` 没有固定大小但是有子级,所以它决定变成它 child 的大小。
The red `Container` tells its child that it can be any size
it wants, but not bigger than the screen.
然后红色的 `Container` 告诉它的 child 可以变成任意大小,但是不能超出屏幕。
The child is a green `Container` that wants to
be 30 × 30. Given that the red `Container` sizes itself to
the size of its child, it is also 30 × 30.
The red color isn't visible because the green `Container`
entirely covers the red `Container`.
而它的 child 是一个想要 30 × 30 大小绿色的 `Container`。由于红色的 `Container`
和其子级一样大,所以也变为 30 × 30。由于绿色的 `Container` 完全覆盖了红色 `Container`,
所以你看不见它了。
### Example 8
### 样例 8
```dart
Center(
child: Container(
color: red,
child: Container(color: green, width: 30, height: 30),
),
)
```
The screen forces the `Center` to be exactly the same
size as the screen, so the `Center` fills the screen.
屏幕强制 `Center` 变得和屏幕一样大,所以 `Center` 充满屏幕。
The `Center` tells the red `Container` that it can be any size
it wants, but not bigger than the screen. Since the red
`Container` has no size but has a child,
it decides it wants to be the same size as its child.
然后 `Center` 告诉红色的 `Container` 可以变成任意大小,但是不能超出屏幕。
由于 `Container` 没有固定大小但是有子级,所以它决定变成它 child 的大小。
The red `Container` tells its child that it can be any size
it wants, but not bigger than the screen.
然后红色的 `Container` 告诉它的 child 可以变成任意大小,但是不能超出屏幕。
The child is a green `Container` that wants to
be 30 × 30. Given that the red `Container` sizes itself to
the size of its child, it is also 30 × 30.
The red color isn't visible because the green `Container`
entirely covers the red `Container`.
而它的 child 是一个想要 30 × 30 大小绿色的 `Container`。由于红色的 `Container`
和其子级一样大,所以也变为 30 × 30。由于绿色的 `Container` 完全覆盖了红色 `Container`,
所以你看不见它了。
### Example 8
### 样例 8
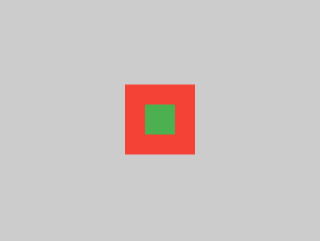 ```dart
Center(
child: Container(
padding: const EdgeInsets.all(20),
color: red,
child: Container(color: green, width: 30, height: 30),
),
)
```
The red `Container` sizes itself to its children's size,
but it takes its own padding into consideration.
So it is also 30 × 30 plus padding.
The red color is visible because of the padding,
and the green `Container` has the same size as
in the previous example.
红色 `Container` 变为其子级的大小,但是它将其 padding 带入了约束的计算中。
所以它有一个 30 x 30 的外边距。由于这个外边距,所以现在你能看见红色了。
而绿色的 `Container` 则还是和之前一样。
### Example 9
### 样例 9
```dart
Center(
child: Container(
padding: const EdgeInsets.all(20),
color: red,
child: Container(color: green, width: 30, height: 30),
),
)
```
The red `Container` sizes itself to its children's size,
but it takes its own padding into consideration.
So it is also 30 × 30 plus padding.
The red color is visible because of the padding,
and the green `Container` has the same size as
in the previous example.
红色 `Container` 变为其子级的大小,但是它将其 padding 带入了约束的计算中。
所以它有一个 30 x 30 的外边距。由于这个外边距,所以现在你能看见红色了。
而绿色的 `Container` 则还是和之前一样。
### Example 9
### 样例 9
 ```dart
ConstrainedBox(
constraints: const BoxConstraints(
minWidth: 70,
minHeight: 70,
maxWidth: 150,
maxHeight: 150,
),
child: Container(color: red, width: 10, height: 10),
)
```
You might guess that the `Container` has to be
between 70 and 150 pixels, but you would be wrong.
The `ConstrainedBox` only imposes **additional** constraints
from those it receives from its parent.
你可能会猜想 `Container` 的尺寸会在 70 到 150 像素之间,但并不是这样。
`ConstrainedBox` 仅对其从其父级接收到的约束下施加其他约束。
Here, the screen forces the `ConstrainedBox` to be exactly
the same size as the screen, so it tells its child `Container`
to also assume the size of the screen, thus ignoring its
`constraints` parameter.
在这里,屏幕迫使 `ConstrainedBox` 与屏幕大小完全相同,
因此它告诉其子 `Widget` 也以屏幕大小作为约束,
从而忽略了其 `constraints` 参数带来的影响。
### Example 10
### 样例 10
```dart
ConstrainedBox(
constraints: const BoxConstraints(
minWidth: 70,
minHeight: 70,
maxWidth: 150,
maxHeight: 150,
),
child: Container(color: red, width: 10, height: 10),
)
```
You might guess that the `Container` has to be
between 70 and 150 pixels, but you would be wrong.
The `ConstrainedBox` only imposes **additional** constraints
from those it receives from its parent.
你可能会猜想 `Container` 的尺寸会在 70 到 150 像素之间,但并不是这样。
`ConstrainedBox` 仅对其从其父级接收到的约束下施加其他约束。
Here, the screen forces the `ConstrainedBox` to be exactly
the same size as the screen, so it tells its child `Container`
to also assume the size of the screen, thus ignoring its
`constraints` parameter.
在这里,屏幕迫使 `ConstrainedBox` 与屏幕大小完全相同,
因此它告诉其子 `Widget` 也以屏幕大小作为约束,
从而忽略了其 `constraints` 参数带来的影响。
### Example 10
### 样例 10
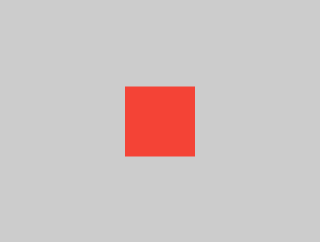 ```dart
Center(
child: ConstrainedBox(
constraints: const BoxConstraints(
minWidth: 70,
minHeight: 70,
maxWidth: 150,
maxHeight: 150,
),
child: Container(color: red, width: 10, height: 10),
),
)
```
Now, `Center` allows `ConstrainedBox` to be any size up to
the screen size. The `ConstrainedBox` imposes **additional**
constraints from its `constraints` parameter onto its child.
现在,`Center` 允许 `ConstrainedBox` 达到屏幕可允许的任意大小。
`ConstrainedBox` 将 `constraints` 参数带来的约束附加到其子对象上。
The Container must be between 70 and 150 pixels.
It wants to have 10 pixels,
so it ends up having 70 (the minimum).
Container 必须介于 70 到 150 像素之间。虽然它希望自己有 10 个像素大小,
但最终获得了 70 个像素(最小为 70)。
### Example 11
### 样例 11
```dart
Center(
child: ConstrainedBox(
constraints: const BoxConstraints(
minWidth: 70,
minHeight: 70,
maxWidth: 150,
maxHeight: 150,
),
child: Container(color: red, width: 10, height: 10),
),
)
```
Now, `Center` allows `ConstrainedBox` to be any size up to
the screen size. The `ConstrainedBox` imposes **additional**
constraints from its `constraints` parameter onto its child.
现在,`Center` 允许 `ConstrainedBox` 达到屏幕可允许的任意大小。
`ConstrainedBox` 将 `constraints` 参数带来的约束附加到其子对象上。
The Container must be between 70 and 150 pixels.
It wants to have 10 pixels,
so it ends up having 70 (the minimum).
Container 必须介于 70 到 150 像素之间。虽然它希望自己有 10 个像素大小,
但最终获得了 70 个像素(最小为 70)。
### Example 11
### 样例 11
 ```dart
Center(
child: ConstrainedBox(
constraints: const BoxConstraints(
minWidth: 70,
minHeight: 70,
maxWidth: 150,
maxHeight: 150,
),
child: Container(color: red, width: 1000, height: 1000),
),
)
```
`Center` allows `ConstrainedBox` to be any size up to the
screen size. The `ConstrainedBox` imposes **additional**
constraints from its `constraints` parameter onto its child.
现在,`Center` 允许 `ConstrainedBox` 达到屏幕可允许的任意大小。
`ConstrainedBox` 将 `constraints` 参数带来的约束附加到其子对象上。
The `Container` must be between 70 and 150 pixels.
It wants to have 1000 pixels,
so it ends up having 150 (the maximum).
`Container` 必须介于 70 到 150 像素之间。
虽然它希望自己有 1000 个像素大小,
但最终获得了 150 个像素(最大为 150)。
### Example 12
### 样例 12
```dart
Center(
child: ConstrainedBox(
constraints: const BoxConstraints(
minWidth: 70,
minHeight: 70,
maxWidth: 150,
maxHeight: 150,
),
child: Container(color: red, width: 1000, height: 1000),
),
)
```
`Center` allows `ConstrainedBox` to be any size up to the
screen size. The `ConstrainedBox` imposes **additional**
constraints from its `constraints` parameter onto its child.
现在,`Center` 允许 `ConstrainedBox` 达到屏幕可允许的任意大小。
`ConstrainedBox` 将 `constraints` 参数带来的约束附加到其子对象上。
The `Container` must be between 70 and 150 pixels.
It wants to have 1000 pixels,
so it ends up having 150 (the maximum).
`Container` 必须介于 70 到 150 像素之间。
虽然它希望自己有 1000 个像素大小,
但最终获得了 150 个像素(最大为 150)。
### Example 12
### 样例 12
 ```dart
Center(
child: ConstrainedBox(
constraints: const BoxConstraints(
minWidth: 70,
minHeight: 70,
maxWidth: 150,
maxHeight: 150,
),
child: Container(color: red, width: 100, height: 100),
),
)
```
`Center` allows `ConstrainedBox` to be any size up to the
screen size. The `ConstrainedBox` imposes **additional**
constraints from its `constraints` parameter onto its child.
现在,`Center` 允许 `ConstrainedBox` 达到屏幕可允许的任意大小。
`ConstrainedBox` 将 `constraints` 参数带来的约束附加到其子对象上。
The `Container` must be between 70 and 150 pixels.
It wants to have 100 pixels, and that's the size it has,
since that's between 70 and 150.
`Container` 必须介于 70 到 150 像素之间。
虽然它希望自己有 100 个像素大小,
因为 100 介于 70 至 150 的范围内,所以最终获得了 100 个像素。
### Example 13
### 样例 13
```dart
Center(
child: ConstrainedBox(
constraints: const BoxConstraints(
minWidth: 70,
minHeight: 70,
maxWidth: 150,
maxHeight: 150,
),
child: Container(color: red, width: 100, height: 100),
),
)
```
`Center` allows `ConstrainedBox` to be any size up to the
screen size. The `ConstrainedBox` imposes **additional**
constraints from its `constraints` parameter onto its child.
现在,`Center` 允许 `ConstrainedBox` 达到屏幕可允许的任意大小。
`ConstrainedBox` 将 `constraints` 参数带来的约束附加到其子对象上。
The `Container` must be between 70 and 150 pixels.
It wants to have 100 pixels, and that's the size it has,
since that's between 70 and 150.
`Container` 必须介于 70 到 150 像素之间。
虽然它希望自己有 100 个像素大小,
因为 100 介于 70 至 150 的范围内,所以最终获得了 100 个像素。
### Example 13
### 样例 13
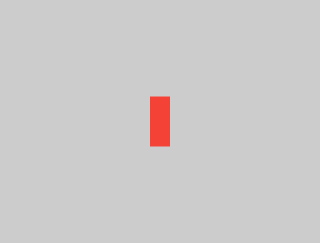 ```dart
UnconstrainedBox(
child: Container(color: red, width: 20, height: 50),
)
```
The screen forces the `UnconstrainedBox` to be exactly
the same size as the screen. However, the `UnconstrainedBox`
lets its child `Container` be any size it wants.
屏幕强制 `UnconstrainedBox` 变得和屏幕一样大,而 `UnconstrainedBox` 允许其子级的 `Container` 可以变为任意大小。
### Example 14
### 样例 14
```dart
UnconstrainedBox(
child: Container(color: red, width: 20, height: 50),
)
```
The screen forces the `UnconstrainedBox` to be exactly
the same size as the screen. However, the `UnconstrainedBox`
lets its child `Container` be any size it wants.
屏幕强制 `UnconstrainedBox` 变得和屏幕一样大,而 `UnconstrainedBox` 允许其子级的 `Container` 可以变为任意大小。
### Example 14
### 样例 14
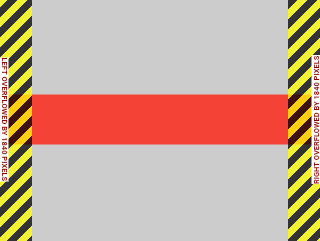 ```dart
UnconstrainedBox(
child: Container(color: red, width: 4000, height: 50),
)
```
The screen forces the `UnconstrainedBox` to be exactly
the same size as the screen, and `UnconstrainedBox`
lets its child `Container` be any size it wants.
屏幕强制 `UnconstrainedBox` 变得和屏幕一样大,
而 `UnconstrainedBox` 允许其子级的 `Container` 可以变为任意大小。
Unfortunately, in this case the `Container` is
4000 pixels wide and is too big to fit in
the `UnconstrainedBox`, so the `UnconstrainedBox` displays
the much dreaded "overflow warning".
不幸的是,在这种情况下,容器的宽度为 4000 像素,
这实在是太大,以至于无法容纳在 `UnconstrainedBox` 中,
因此 `UnconstrainedBox` 将显示溢出警告(overflow warning)。
### Example 15
### 样例 15
```dart
UnconstrainedBox(
child: Container(color: red, width: 4000, height: 50),
)
```
The screen forces the `UnconstrainedBox` to be exactly
the same size as the screen, and `UnconstrainedBox`
lets its child `Container` be any size it wants.
屏幕强制 `UnconstrainedBox` 变得和屏幕一样大,
而 `UnconstrainedBox` 允许其子级的 `Container` 可以变为任意大小。
Unfortunately, in this case the `Container` is
4000 pixels wide and is too big to fit in
the `UnconstrainedBox`, so the `UnconstrainedBox` displays
the much dreaded "overflow warning".
不幸的是,在这种情况下,容器的宽度为 4000 像素,
这实在是太大,以至于无法容纳在 `UnconstrainedBox` 中,
因此 `UnconstrainedBox` 将显示溢出警告(overflow warning)。
### Example 15
### 样例 15
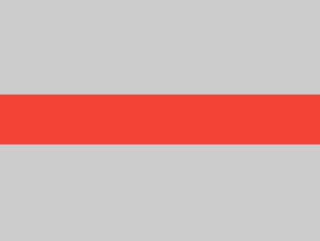 ```dart
OverflowBox(
minWidth: 0,
minHeight: 0,
maxWidth: double.infinity,
maxHeight: double.infinity,
child: Container(color: red, width: 4000, height: 50),
)
```
The screen forces the `OverflowBox` to be exactly the same
size as the screen, and `OverflowBox` lets its child `Container`
be any size it wants.
屏幕强制 `OverflowBox` 变得和屏幕一样大,
并且 `OverflowBox` 允许其子容器设置为任意大小。
`OverflowBox` is similar to `UnconstrainedBox`;
the difference is that it won't display any warnings
if the child doesn't fit the space.
`OverflowBox` 与 `UnconstrainedBox` 类似,但不同的是,
如果其子级超出该空间,它将不会显示任何警告。
In this case, the `Container` has 4000 pixels of width,
and is too big to fit in the `OverflowBox`,
but the `OverflowBox` simply shows as much as it can,
with no warnings given.
在这种情况下,容器的宽度为 4000 像素,并且太大而无法容纳在 `OverflowBox` 中,
但是 `OverflowBox` 会全部显示,而不会发出警告。
### Example 16
### 样例 16
```dart
OverflowBox(
minWidth: 0,
minHeight: 0,
maxWidth: double.infinity,
maxHeight: double.infinity,
child: Container(color: red, width: 4000, height: 50),
)
```
The screen forces the `OverflowBox` to be exactly the same
size as the screen, and `OverflowBox` lets its child `Container`
be any size it wants.
屏幕强制 `OverflowBox` 变得和屏幕一样大,
并且 `OverflowBox` 允许其子容器设置为任意大小。
`OverflowBox` is similar to `UnconstrainedBox`;
the difference is that it won't display any warnings
if the child doesn't fit the space.
`OverflowBox` 与 `UnconstrainedBox` 类似,但不同的是,
如果其子级超出该空间,它将不会显示任何警告。
In this case, the `Container` has 4000 pixels of width,
and is too big to fit in the `OverflowBox`,
but the `OverflowBox` simply shows as much as it can,
with no warnings given.
在这种情况下,容器的宽度为 4000 像素,并且太大而无法容纳在 `OverflowBox` 中,
但是 `OverflowBox` 会全部显示,而不会发出警告。
### Example 16
### 样例 16
 ```dart
UnconstrainedBox(
child: Container(color: Colors.red, width: double.infinity, height: 100),
)
```
This won't render anything, and you'll see an error in the console.
这将不会渲染任何东西,而且你能在控制台看到错误信息。
The `UnconstrainedBox` lets its child be any size it wants,
however its child is a `Container` with infinite size.
`UnconstrainedBox` 让它的子级决定成为任何大小,
但是其子级是一个具有无限大小的 `Container`。
Flutter can't render infinite sizes, so it throws an error with
the following message: `BoxConstraints forces an infinite width.`
Flutter 无法渲染无限大的东西,所以它抛出以下错误:
`BoxConstraints forces an infinite width.`(盒子约束强制使用了无限的宽度)
### Example 17
### 样例 17
```dart
UnconstrainedBox(
child: Container(color: Colors.red, width: double.infinity, height: 100),
)
```
This won't render anything, and you'll see an error in the console.
这将不会渲染任何东西,而且你能在控制台看到错误信息。
The `UnconstrainedBox` lets its child be any size it wants,
however its child is a `Container` with infinite size.
`UnconstrainedBox` 让它的子级决定成为任何大小,
但是其子级是一个具有无限大小的 `Container`。
Flutter can't render infinite sizes, so it throws an error with
the following message: `BoxConstraints forces an infinite width.`
Flutter 无法渲染无限大的东西,所以它抛出以下错误:
`BoxConstraints forces an infinite width.`(盒子约束强制使用了无限的宽度)
### Example 17
### 样例 17
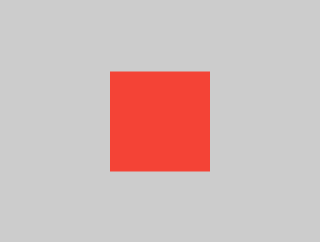 ```dart
UnconstrainedBox(
child: LimitedBox(
maxWidth: 100,
child: Container(
color: Colors.red,
width: double.infinity,
height: 100,
),
),
)
```
Here you won't get an error anymore,
because when the `LimitedBox` is given an
infinite size by the `UnconstrainedBox`;
it passes a maximum width of 100 down to its child.
这次你就不会遇到报错了。
`UnconstrainedBox` 给 `LimitedBox` 一个无限的大小;
但它向其子级传递了最大为 100 的约束。
If you swap the `UnconstrainedBox` for a `Center` widget,
the `LimitedBox` won't apply its limit anymore
(since its limit is only applied when it gets infinite
constraints), and the width of the `Container`
is allowed to grow past 100.
如果你将 `UnconstrainedBox` 替换为 `Center`,
则`LimitedBox` 将不再应用其限制(因为其限制仅在获得无限约束时才适用),
并且容器的宽度允许超过 100。
This explains the difference between a `LimitedBox`
and a `ConstrainedBox`.
上面的样例解释了 `LimitedBox` 和 `ConstrainedBox` 之间的区别。
### Example 18
### 样例 18
```dart
UnconstrainedBox(
child: LimitedBox(
maxWidth: 100,
child: Container(
color: Colors.red,
width: double.infinity,
height: 100,
),
),
)
```
Here you won't get an error anymore,
because when the `LimitedBox` is given an
infinite size by the `UnconstrainedBox`;
it passes a maximum width of 100 down to its child.
这次你就不会遇到报错了。
`UnconstrainedBox` 给 `LimitedBox` 一个无限的大小;
但它向其子级传递了最大为 100 的约束。
If you swap the `UnconstrainedBox` for a `Center` widget,
the `LimitedBox` won't apply its limit anymore
(since its limit is only applied when it gets infinite
constraints), and the width of the `Container`
is allowed to grow past 100.
如果你将 `UnconstrainedBox` 替换为 `Center`,
则`LimitedBox` 将不再应用其限制(因为其限制仅在获得无限约束时才适用),
并且容器的宽度允许超过 100。
This explains the difference between a `LimitedBox`
and a `ConstrainedBox`.
上面的样例解释了 `LimitedBox` 和 `ConstrainedBox` 之间的区别。
### Example 18
### 样例 18
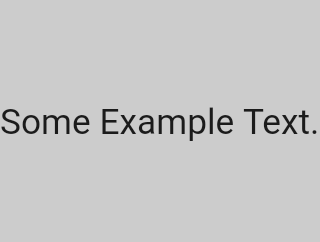 ```dart
const FittedBox(child: Text('Some Example Text.'))
```
The screen forces the `FittedBox` to be exactly the same
size as the screen. The `Text` has some natural width
(also called its intrinsic width) that depends on the
amount of text, its font size, and so on.
屏幕强制 `FittedBox` 变得和屏幕一样大,
而 `Text` 则是有一个自然宽度(也被称作 intrinsic 宽度),
它取决于文本数量,字体大小等因素。
The `FittedBox` lets the `Text` be any size it wants,
but after the `Text` tells its size to the `FittedBox`,
the `FittedBox` scales the Text until it fills all of
the available width.
`FittedBox` 让 `Text` 可以变为任意大小。
但是在 `Text` 告诉 `FittedBox` 其大小后,
`FittedBox` 缩放文本直到填满所有可用宽度。
### Example 19
### 样例 19
```dart
const FittedBox(child: Text('Some Example Text.'))
```
The screen forces the `FittedBox` to be exactly the same
size as the screen. The `Text` has some natural width
(also called its intrinsic width) that depends on the
amount of text, its font size, and so on.
屏幕强制 `FittedBox` 变得和屏幕一样大,
而 `Text` 则是有一个自然宽度(也被称作 intrinsic 宽度),
它取决于文本数量,字体大小等因素。
The `FittedBox` lets the `Text` be any size it wants,
but after the `Text` tells its size to the `FittedBox`,
the `FittedBox` scales the Text until it fills all of
the available width.
`FittedBox` 让 `Text` 可以变为任意大小。
但是在 `Text` 告诉 `FittedBox` 其大小后,
`FittedBox` 缩放文本直到填满所有可用宽度。
### Example 19
### 样例 19
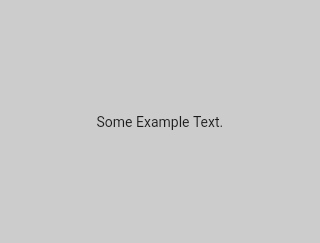 ```dart
const Center(child: FittedBox(child: Text('Some Example Text.')))
```
But what happens if you put the `FittedBox` inside of a
`Center` widget? The `Center` lets the `FittedBox`
be any size it wants, up to the screen size.
但如果你将 `FittedBox` 放进 `Center` widget 中会发生什么?
`Center` 将会让 `FittedBox` 能够变为任意大小,
取决于屏幕大小。
The `FittedBox` then sizes itself to the `Text`,
and lets the `Text` be any size it wants.
Since both `FittedBox` and the `Text` have the same size,
no scaling happens.
`FittedBox` 然后会根据 `Text` 调整自己的大小,
然后让 `Text` 可以变为所需的任意大小,
由于二者具有同一大小,因此不会发生缩放。
### Example 20
### 样例 20
```dart
const Center(child: FittedBox(child: Text('Some Example Text.')))
```
But what happens if you put the `FittedBox` inside of a
`Center` widget? The `Center` lets the `FittedBox`
be any size it wants, up to the screen size.
但如果你将 `FittedBox` 放进 `Center` widget 中会发生什么?
`Center` 将会让 `FittedBox` 能够变为任意大小,
取决于屏幕大小。
The `FittedBox` then sizes itself to the `Text`,
and lets the `Text` be any size it wants.
Since both `FittedBox` and the `Text` have the same size,
no scaling happens.
`FittedBox` 然后会根据 `Text` 调整自己的大小,
然后让 `Text` 可以变为所需的任意大小,
由于二者具有同一大小,因此不会发生缩放。
### Example 20
### 样例 20
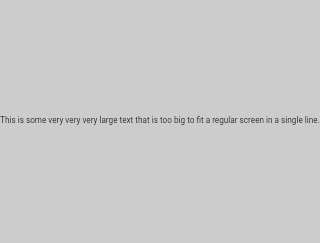 ```dart
const Center(
child: FittedBox(
child: Text(
'This is some very very very large text that is too big to fit a regular screen in a single line.',
),
),
)
```
However, what happens if `FittedBox` is inside of a `Center`
widget, but the `Text` is too large to fit the screen?
然而,如果 `FittedBox` 位于 `Center` 中,
但 `Text` 太大而超出屏幕,会发生什么?
`FittedBox` tries to size itself to the `Text`,
but it can't be bigger than the screen.
It then assumes the screen size,
and resizes `Text` so that it fits the screen, too.
FittedBox 会尝试根据 `Text` 大小调整大小,
但不能大于屏幕大小。然后假定屏幕大小,
并调整 `Text` 的大小以使其也适合屏幕。
### Example 21
### 样例 21
```dart
const Center(
child: FittedBox(
child: Text(
'This is some very very very large text that is too big to fit a regular screen in a single line.',
),
),
)
```
However, what happens if `FittedBox` is inside of a `Center`
widget, but the `Text` is too large to fit the screen?
然而,如果 `FittedBox` 位于 `Center` 中,
但 `Text` 太大而超出屏幕,会发生什么?
`FittedBox` tries to size itself to the `Text`,
but it can't be bigger than the screen.
It then assumes the screen size,
and resizes `Text` so that it fits the screen, too.
FittedBox 会尝试根据 `Text` 大小调整大小,
但不能大于屏幕大小。然后假定屏幕大小,
并调整 `Text` 的大小以使其也适合屏幕。
### Example 21
### 样例 21
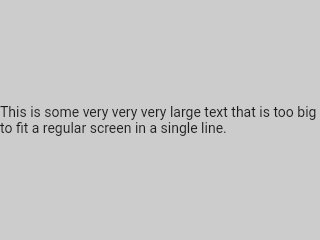 ```dart
const Center(
child: Text(
'This is some very very very large text that is too big to fit a regular screen in a single line.',
),
)
```
If, however, you remove the `FittedBox`, the `Text`
gets its maximum width from the screen,
and breaks the line so that it fits the screen.
然而,如果你删除了 `FittedBox`,
`Text` 则会从屏幕上获取其最大宽度,
并在合适的地方换行。
### Example 22
### 样例 22
```dart
const Center(
child: Text(
'This is some very very very large text that is too big to fit a regular screen in a single line.',
),
)
```
If, however, you remove the `FittedBox`, the `Text`
gets its maximum width from the screen,
and breaks the line so that it fits the screen.
然而,如果你删除了 `FittedBox`,
`Text` 则会从屏幕上获取其最大宽度,
并在合适的地方换行。
### Example 22
### 样例 22
 ```dart
FittedBox(
child: Container(height: 20, width: double.infinity, color: Colors.red),
)
```
`FittedBox` can only scale a widget that is bounded
(has non-infinite width and height). Otherwise,
it won't render anything,
and you'll see an error in the console.
`FittedBox` 只能在有限制的宽高中
对子 widget 进行缩放(宽度和高度不会变得无限大)。
否则,它将无法渲染任何内容,并且你会在控制台中看到错误。
### Example 23
### 样例 23
```dart
FittedBox(
child: Container(height: 20, width: double.infinity, color: Colors.red),
)
```
`FittedBox` can only scale a widget that is bounded
(has non-infinite width and height). Otherwise,
it won't render anything,
and you'll see an error in the console.
`FittedBox` 只能在有限制的宽高中
对子 widget 进行缩放(宽度和高度不会变得无限大)。
否则,它将无法渲染任何内容,并且你会在控制台中看到错误。
### Example 23
### 样例 23
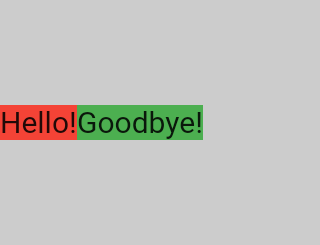 ```dart
Row(
children: [
Container(
color: red,
child: const Text('Hello!', style: big),
),
Container(
color: green,
child: const Text('Goodbye!', style: big),
),
],
)
```
The screen forces the `Row` to be exactly the same size
as the screen.
屏幕强制 `Row` 变得和屏幕一样大,所以 `Row` 充满屏幕。
Just like an `UnconstrainedBox`, the `Row` won't
impose any constraints onto its children,
and instead lets them be any size they want.
The `Row` then puts them side-by-side,
and any extra space remains empty.
和 `UnconstrainedBox` 一样,
`Row` 也不会对其子代施加任何约束,
而是让它们成为所需的任意大小。
`Row` 然后将它们并排放置,
任何多余的空间都将保持空白。
### Example 24
### 样例 24
```dart
Row(
children: [
Container(
color: red,
child: const Text('Hello!', style: big),
),
Container(
color: green,
child: const Text('Goodbye!', style: big),
),
],
)
```
The screen forces the `Row` to be exactly the same size
as the screen.
屏幕强制 `Row` 变得和屏幕一样大,所以 `Row` 充满屏幕。
Just like an `UnconstrainedBox`, the `Row` won't
impose any constraints onto its children,
and instead lets them be any size they want.
The `Row` then puts them side-by-side,
and any extra space remains empty.
和 `UnconstrainedBox` 一样,
`Row` 也不会对其子代施加任何约束,
而是让它们成为所需的任意大小。
`Row` 然后将它们并排放置,
任何多余的空间都将保持空白。
### Example 24
### 样例 24
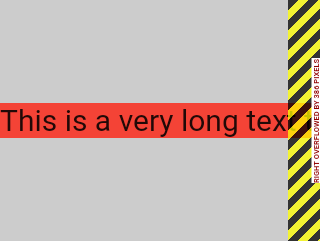 ```dart
Row(
children: [
Container(
color: red,
child: const Text(
'This is a very long text that '
'won\'t fit the line.',
style: big,
),
),
Container(
color: green,
child: const Text('Goodbye!', style: big),
),
],
)
```
Since `Row` won't impose any constraints onto its children,
it's quite possible that the children might be too big to fit
the available width of the `Row`. In this case, just like an
`UnconstrainedBox`, the `Row` displays the "overflow warning".
由于 `Row` 不会对其子级施加任何约束,
因此它的 children 很有可能太大
而超出 `Row` 的可用宽度。在这种情况下,
`Row` 会和 `UnconstrainedBox` 一样显示溢出警告。
### Example 25
### 样例 25
```dart
Row(
children: [
Container(
color: red,
child: const Text(
'This is a very long text that '
'won\'t fit the line.',
style: big,
),
),
Container(
color: green,
child: const Text('Goodbye!', style: big),
),
],
)
```
Since `Row` won't impose any constraints onto its children,
it's quite possible that the children might be too big to fit
the available width of the `Row`. In this case, just like an
`UnconstrainedBox`, the `Row` displays the "overflow warning".
由于 `Row` 不会对其子级施加任何约束,
因此它的 children 很有可能太大
而超出 `Row` 的可用宽度。在这种情况下,
`Row` 会和 `UnconstrainedBox` 一样显示溢出警告。
### Example 25
### 样例 25
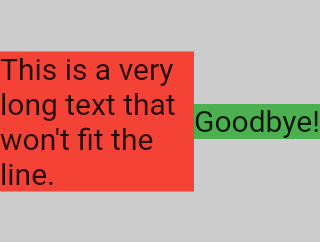 ```dart
Row(
children: [
Expanded(
child: Center(
child: Container(
color: red,
child: const Text(
'This is a very long text that won\'t fit the line.',
style: big,
),
),
),
),
Container(
color: green,
child: const Text('Goodbye!', style: big),
),
],
)
```
When a `Row`'s child is wrapped in an `Expanded` widget,
the `Row` won't let this child define its own width anymore.
当 `Row` 的子级被包裹在了 `Expanded` widget 之后,
`Row` 将不会再让其决定自身的宽度了。
Instead, it defines the `Expanded` width according to the
other children, and only then the `Expanded` widget forces
the original child to have the `Expanded`'s width.
取而代之的是,`Row` 会根据所有 `Expanded` 的子级
来计算其该有的宽度。
In other words, once you use `Expanded`,
the original child's width becomes irrelevant, and is ignored.
换句话说,一旦你使用 `Expanded`,
子级自身的宽度就变得无关紧要,直接会被忽略掉。
### Example 26
### 样例 26
```dart
Row(
children: [
Expanded(
child: Center(
child: Container(
color: red,
child: const Text(
'This is a very long text that won\'t fit the line.',
style: big,
),
),
),
),
Container(
color: green,
child: const Text('Goodbye!', style: big),
),
],
)
```
When a `Row`'s child is wrapped in an `Expanded` widget,
the `Row` won't let this child define its own width anymore.
当 `Row` 的子级被包裹在了 `Expanded` widget 之后,
`Row` 将不会再让其决定自身的宽度了。
Instead, it defines the `Expanded` width according to the
other children, and only then the `Expanded` widget forces
the original child to have the `Expanded`'s width.
取而代之的是,`Row` 会根据所有 `Expanded` 的子级
来计算其该有的宽度。
In other words, once you use `Expanded`,
the original child's width becomes irrelevant, and is ignored.
换句话说,一旦你使用 `Expanded`,
子级自身的宽度就变得无关紧要,直接会被忽略掉。
### Example 26
### 样例 26
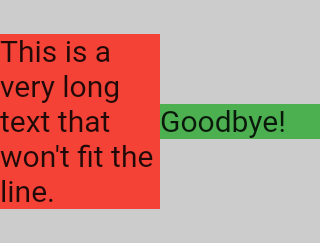 ```dart
Row(
children: [
Expanded(
child: Container(
color: red,
child: const Text(
'This is a very long text that won\'t fit the line.',
style: big,
),
),
),
Expanded(
child: Container(
color: green,
child: const Text('Goodbye!', style: big),
),
),
],
)
```
If all of `Row`'s children are wrapped in `Expanded` widgets,
each `Expanded` has a size proportional to its flex parameter,
and only then each `Expanded` widget forces its child to have
the `Expanded`'s width.
如果所有 `Row` 的子级都被包裹了 `Expanded` widget,
每一个 `Expanded` 大小都会与其 flex 因子成比例,
并且 `Expanded` widget 将会强制其子级具有与 `Expanded` 相同的宽度。
In other words, `Expanded` ignores the preferred width of
its children.
换句话说,`Expanded` 忽略了其子 `Widget` 想要的宽度。
### Example 27
### 样例 27
```dart
Row(
children: [
Expanded(
child: Container(
color: red,
child: const Text(
'This is a very long text that won\'t fit the line.',
style: big,
),
),
),
Expanded(
child: Container(
color: green,
child: const Text('Goodbye!', style: big),
),
),
],
)
```
If all of `Row`'s children are wrapped in `Expanded` widgets,
each `Expanded` has a size proportional to its flex parameter,
and only then each `Expanded` widget forces its child to have
the `Expanded`'s width.
如果所有 `Row` 的子级都被包裹了 `Expanded` widget,
每一个 `Expanded` 大小都会与其 flex 因子成比例,
并且 `Expanded` widget 将会强制其子级具有与 `Expanded` 相同的宽度。
In other words, `Expanded` ignores the preferred width of
its children.
换句话说,`Expanded` 忽略了其子 `Widget` 想要的宽度。
### Example 27
### 样例 27
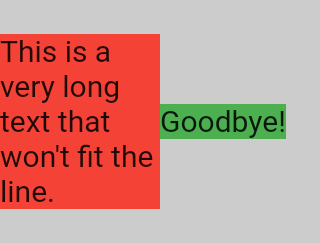 ```dart
Row(
children: [
Flexible(
child: Container(
color: red,
child: const Text(
'This is a very long text that won\'t fit the line.',
style: big,
),
),
),
Flexible(
child: Container(
color: green,
child: const Text('Goodbye!', style: big),
),
),
],
)
```
The only difference if you use `Flexible` instead of `Expanded`,
is that `Flexible` lets its child have the same or smaller
width than the `Flexible` itself, while `Expanded` forces
its child to have the exact same width of the `Expanded`.
But both `Expanded` and `Flexible` ignore their children's width
when sizing themselves.
如果你使用 `Flexible` 而不是 `Expanded` 的话,
唯一的区别是,`Flexible` 会让其子级具有与
`Flexible` 相同或者更小的宽度。
而 `Expanded` 将会强制其子级具有和
`Expanded` 相同的宽度。
但无论是 `Expanded` 还是 `Flexible`
在它们决定子级大小时都会忽略其宽度。
:::note
This means that it's impossible to expand `Row` children
proportionally to their sizes. The `Row` either uses
the exact child's width, or ignores it completely
when you use `Expanded` or `Flexible`.
这意味着,`Row` 要么使用子级的宽度,
要么使用`Expanded` 和 `Flexible` 从而忽略子级的宽度。
:::
### Example 28
### 样例 28
```dart
Row(
children: [
Flexible(
child: Container(
color: red,
child: const Text(
'This is a very long text that won\'t fit the line.',
style: big,
),
),
),
Flexible(
child: Container(
color: green,
child: const Text('Goodbye!', style: big),
),
),
],
)
```
The only difference if you use `Flexible` instead of `Expanded`,
is that `Flexible` lets its child have the same or smaller
width than the `Flexible` itself, while `Expanded` forces
its child to have the exact same width of the `Expanded`.
But both `Expanded` and `Flexible` ignore their children's width
when sizing themselves.
如果你使用 `Flexible` 而不是 `Expanded` 的话,
唯一的区别是,`Flexible` 会让其子级具有与
`Flexible` 相同或者更小的宽度。
而 `Expanded` 将会强制其子级具有和
`Expanded` 相同的宽度。
但无论是 `Expanded` 还是 `Flexible`
在它们决定子级大小时都会忽略其宽度。
:::note
This means that it's impossible to expand `Row` children
proportionally to their sizes. The `Row` either uses
the exact child's width, or ignores it completely
when you use `Expanded` or `Flexible`.
这意味着,`Row` 要么使用子级的宽度,
要么使用`Expanded` 和 `Flexible` 从而忽略子级的宽度。
:::
### Example 28
### 样例 28
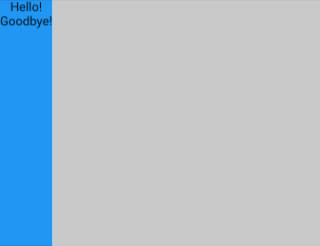 ```dart
Scaffold(
body: Container(
color: blue,
child: const Column(children: [Text('Hello!'), Text('Goodbye!')]),
),
)
```
The screen forces the `Scaffold` to be exactly the same size
as the screen, so the `Scaffold` fills the screen.
The `Scaffold` tells the `Container` that it can be any size it wants,
but not bigger than the screen.
屏幕强制 `Scaffold` 变得和屏幕一样大,
所以 `Scaffold` 充满屏幕。
然后 `Scaffold` 告诉 `Container` 可以变为任意大小,
但不能超出屏幕。
:::note
When a widget tells its child that it can be smaller than a
certain size, we say the widget supplies _loose_ constraints
to its child. More on that later.
当一个 widget 告诉其子级可以比自身更小的话,
我们通常称这个 widget 对其子级使用 **宽松约束(loose)**。
:::
### Example 29
### 样例 29
```dart
Scaffold(
body: Container(
color: blue,
child: const Column(children: [Text('Hello!'), Text('Goodbye!')]),
),
)
```
The screen forces the `Scaffold` to be exactly the same size
as the screen, so the `Scaffold` fills the screen.
The `Scaffold` tells the `Container` that it can be any size it wants,
but not bigger than the screen.
屏幕强制 `Scaffold` 变得和屏幕一样大,
所以 `Scaffold` 充满屏幕。
然后 `Scaffold` 告诉 `Container` 可以变为任意大小,
但不能超出屏幕。
:::note
When a widget tells its child that it can be smaller than a
certain size, we say the widget supplies _loose_ constraints
to its child. More on that later.
当一个 widget 告诉其子级可以比自身更小的话,
我们通常称这个 widget 对其子级使用 **宽松约束(loose)**。
:::
### Example 29
### 样例 29
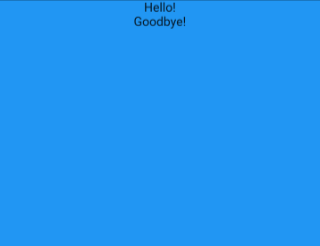 ```dart
Scaffold(
body: SizedBox.expand(
child: Container(
color: blue,
child: const Column(children: [Text('Hello!'), Text('Goodbye!')]),
),
),
)
```
If you want the `Scaffold`'s child to be exactly the same size
as the `Scaffold` itself, you can wrap its child with
`SizedBox.expand`.
如果你想要 `Scaffold` 的子级变得和 `Scaffold` 本身一样大的话,
你可以将这个子级外包裹一个 `SizedBox.expand`。
## Tight vs loose constraints
## 严格约束 (Tight) 与 宽松约束 (loose)
It's very common to hear that some constraint is
"tight" or "loose", so what does that mean?
以后你经常会听到一些约束为严格约束或宽松约束,
你花点时间来弄明白它们是值得的。
### Tight constraints
### 严格约束 (Tight)
A _tight_ constraint offers a single possibility,
an exact size. In other words, a tight constraint
has its maximum width equal to its minimum width;
and has its maximum height equal to its minimum height.
严格约束给你了一种获得确切大小的选择。
换句话来说就是,它的最大/最小宽度是一致的,高度也一样。
An example of this is the `App` widget,
which is contained by the [`RenderView`][] class:
the box used by the child returned by the
application's [`build`][] function is given a constraint
that forces it to exactly fill the application's content area
(typically, the entire screen).
如果把 [`RenderView`][] 包含的 `App` widget 作为一个例子来看:
[`build`][] 方法返回的子节点的 box 拥有上层节点传递的限制,
它会撑满应用的整个内容区域(即整个屏幕)。
Another example: if you nest a bunch of boxes inside
each other at the root of your application's render tree,
they'll all exactly fit in each other,
forced by the box's tight constraints.
另一个例子:如果你从根节点嵌套多个 box,
它们会依次完全撑满,遵守严格约束。
If you go to Flutter's `box.dart` file and search for
the `BoxConstraints` constructors,
you'll find the following:
如果你到 Flutter 的 `box.dart` 文件中搜索
`BoxConstraints` 构造器,你会发现以下内容:
```dart
BoxConstraints.tight(Size size)
: minWidth = size.width,
maxWidth = size.width,
minHeight = size.height,
maxHeight = size.height;
```
If you revisit [Example 2](#example-2),
the screen forces the red `Container` to be
exactly the same size as the screen.
The screen achieves that, of course, by passing tight
constraints to the `Container`.
如果你重新阅读 [样例 2](#example-2),
它告诉我们屏幕强制 `Container` 变得和屏幕一样大。
为何屏幕能够做到这一点,
原因就是给 `Container` 传递了严格约束。
### Loose constraints
### 宽松约束 (loose)
A _loose_ constraint is one that has a minimum
of zero and a maximum non-zero.
**宽松** 约束的最小宽度/高度为 **0**。
Some boxes _loosen_ the incoming constraints,
meaning the maximum is maintained but the
minimum is removed, so the widget can have
a **minimum** width and height both equal to **zero**.
Ultimately, `Center`'s purpose is to transform
the tight constraints it received from its parent
(the screen) to loose constraints for its child
(the `Container`).
总的来说,`Center` 起的作用就是从其父级(屏幕)那里获得的严格约束,
为其子级(`Container`)转换为宽松约束。
If you revisit [Example 3](#example-3),
the `Center` allows the red `Container` to be smaller,
but not bigger than the screen.
如果你访问 [样例 3](#example-3),
它将会告诉我们 `Center` 让红色的 `Container` 变得更小,
但是不能超出屏幕。`Center` 能够做到这一点的原因就在于
给 `Container` 的是一个宽松约束。
[`build`]: https://api.flutter-io.cn/flutter/widgets/State/build.html
[`RenderView`]: https://api.flutter-io.cn/flutter/rendering/RenderView-class.html
## Unbounded constraints
:::note
You might be directed here if the framework
detects a problem involving box constraints.
The `Flex` section below might also apply.
:::
In certain situations,
a box's constraint is _unbounded_, or infinite.
This means that either the maximum width or
the maximum height is set to [`double.infinity`][].
A box that tries to be as big as possible won't
function usefully when given an unbounded constraint and,
in debug mode, throws an exception.
The most common case where a render box ends up
with an unbounded constraint is within a flex box
([`Row`][] or [`Column`][]),
and **within a scrollable region**
(such as [`ListView`][] and other [`ScrollView`][] subclasses).
[`ListView`][], for example,
tries to expand to fit the space available
in its cross-direction
(perhaps it's a vertically-scrolling block and
tries to be as wide as its parent).
If you nest a vertically scrolling [`ListView`][]
inside a horizontally scrolling `ListView`,
the inner list tries to be as wide as possible,
which is infinitely wide,
since the outer one is scrollable in that direction.
The next section describes the error you might
encounter with unbounded constraints in a `Flex` widget.
## Flex
A flex box ([`Row`][] and [`Column`][]) behaves
differently depending on whether its
constraint is bounded or unbounded in
its primary direction.
A flex box with a bounded constraint in its
primary direction tries to be as big as possible.
A flex box with an unbounded constraint
in its primary direction tries to fit its children
in that space. Each child's `flex` value must be
set to zero, meaning that you can't use
[`Expanded`][] when the flex box is inside
another flex box or a scrollable;
otherwise it throws an exception.
The _cross_ direction
(width for [`Column`][] or height for [`Row`][]),
must _never_ be unbounded,
or it can't reasonably align its children.
[`double.infinity`]: https://api.flutter-io.cn/flutter/dart-core/double/infinity-constant.html
[`Expanded`]: https://api.flutter-io.cn/flutter/widgets/Expanded-class.html
[`RenderBox`]: https://api.flutter-io.cn/flutter/rendering/RenderBox-class.html
[`ScrollView`]: https://api.flutter-io.cn/flutter/widgets/ScrollView-class.html
## Learning the layout rules for specific widgets
## 了解如何为特定 widget 制定布局规则
Knowing the general layout rule is necessary, but it's not enough.
掌握通用布局是非常重要的,但这还不够。
Each widget has a lot of freedom when applying the general rule,
so there is no way of knowing how it behaves by just reading
the widget's name.
应用一般规则时,每个 widget 都具有很大的自由度,
所以没有办法只看 widget 的名称就知道可能它长什么样。
If you try to guess, you'll probably guess wrong.
You can't know exactly how a widget behaves unless
you've read its documentation, or studied its source-code.
如果你尝试推测,可能就会猜错。
除非你已阅读 widget 的文档或研究了其源代码,
否则你无法确切知道 widget 的行为。
The layout source-code is usually complex,
so it's probably better to just read the documentation.
However, if you decide to study the layout source-code,
you can easily find it by using the navigating capabilities
of your IDE.
布局源代码通常很复杂,因此阅读文档是更好的选择。
但是当你在研究布局源代码时,可以使用 IDE 的导航功能轻松找到它。
Here's an example:
下面是一个例子:
* Find a `Column` in your code and navigate to its
source code. To do this, use `command+B` (macOS)
or `control+B` (Windows/Linux) in Android Studio or IntelliJ.
You'll be taken to the `basic.dart` file.
Since `Column` extends `Flex`, navigate to the `Flex`
source code (also in `basic.dart`).
在你的代码中找到一个 `Column` 并跟进到它的源代码。
为此,请在 (Android Studio/IntelliJ) 中使用
`command+B`(macOS)或 `control+B`(Windows/Linux)。
你将跳到 `basic.dart` 文件中。由于 `Column` 扩展了 `Flex`,
请导航至 `Flex` 源代码(也位于 `basic.dart` 中)。
* Scroll down until you find a method called
`createRenderObject()`. As you can see,
this method returns a `RenderFlex`.
This is the render-object for the `Column`.
Now navigate to the source-code of `RenderFlex`,
which takes you to the `flex.dart` file.
向下滚动直到找到一个名为 `createRenderObject()` 的方法。
如你所见,此方法返回一个 `RenderFlex`。
它是 `Column` 的渲染对象,
现在导航到 `flex.dart` 文件中的 `RenderFlex` 的源代码。
* Scroll down until you find a method called
`performLayout()`. This is the method that does
the layout for the `Column`.
向下滚动,直到找到 `performLayout()` 方法,
由该方法执行列布局。
```dart
Scaffold(
body: SizedBox.expand(
child: Container(
color: blue,
child: const Column(children: [Text('Hello!'), Text('Goodbye!')]),
),
),
)
```
If you want the `Scaffold`'s child to be exactly the same size
as the `Scaffold` itself, you can wrap its child with
`SizedBox.expand`.
如果你想要 `Scaffold` 的子级变得和 `Scaffold` 本身一样大的话,
你可以将这个子级外包裹一个 `SizedBox.expand`。
## Tight vs loose constraints
## 严格约束 (Tight) 与 宽松约束 (loose)
It's very common to hear that some constraint is
"tight" or "loose", so what does that mean?
以后你经常会听到一些约束为严格约束或宽松约束,
你花点时间来弄明白它们是值得的。
### Tight constraints
### 严格约束 (Tight)
A _tight_ constraint offers a single possibility,
an exact size. In other words, a tight constraint
has its maximum width equal to its minimum width;
and has its maximum height equal to its minimum height.
严格约束给你了一种获得确切大小的选择。
换句话来说就是,它的最大/最小宽度是一致的,高度也一样。
An example of this is the `App` widget,
which is contained by the [`RenderView`][] class:
the box used by the child returned by the
application's [`build`][] function is given a constraint
that forces it to exactly fill the application's content area
(typically, the entire screen).
如果把 [`RenderView`][] 包含的 `App` widget 作为一个例子来看:
[`build`][] 方法返回的子节点的 box 拥有上层节点传递的限制,
它会撑满应用的整个内容区域(即整个屏幕)。
Another example: if you nest a bunch of boxes inside
each other at the root of your application's render tree,
they'll all exactly fit in each other,
forced by the box's tight constraints.
另一个例子:如果你从根节点嵌套多个 box,
它们会依次完全撑满,遵守严格约束。
If you go to Flutter's `box.dart` file and search for
the `BoxConstraints` constructors,
you'll find the following:
如果你到 Flutter 的 `box.dart` 文件中搜索
`BoxConstraints` 构造器,你会发现以下内容:
```dart
BoxConstraints.tight(Size size)
: minWidth = size.width,
maxWidth = size.width,
minHeight = size.height,
maxHeight = size.height;
```
If you revisit [Example 2](#example-2),
the screen forces the red `Container` to be
exactly the same size as the screen.
The screen achieves that, of course, by passing tight
constraints to the `Container`.
如果你重新阅读 [样例 2](#example-2),
它告诉我们屏幕强制 `Container` 变得和屏幕一样大。
为何屏幕能够做到这一点,
原因就是给 `Container` 传递了严格约束。
### Loose constraints
### 宽松约束 (loose)
A _loose_ constraint is one that has a minimum
of zero and a maximum non-zero.
**宽松** 约束的最小宽度/高度为 **0**。
Some boxes _loosen_ the incoming constraints,
meaning the maximum is maintained but the
minimum is removed, so the widget can have
a **minimum** width and height both equal to **zero**.
Ultimately, `Center`'s purpose is to transform
the tight constraints it received from its parent
(the screen) to loose constraints for its child
(the `Container`).
总的来说,`Center` 起的作用就是从其父级(屏幕)那里获得的严格约束,
为其子级(`Container`)转换为宽松约束。
If you revisit [Example 3](#example-3),
the `Center` allows the red `Container` to be smaller,
but not bigger than the screen.
如果你访问 [样例 3](#example-3),
它将会告诉我们 `Center` 让红色的 `Container` 变得更小,
但是不能超出屏幕。`Center` 能够做到这一点的原因就在于
给 `Container` 的是一个宽松约束。
[`build`]: https://api.flutter-io.cn/flutter/widgets/State/build.html
[`RenderView`]: https://api.flutter-io.cn/flutter/rendering/RenderView-class.html
## Unbounded constraints
:::note
You might be directed here if the framework
detects a problem involving box constraints.
The `Flex` section below might also apply.
:::
In certain situations,
a box's constraint is _unbounded_, or infinite.
This means that either the maximum width or
the maximum height is set to [`double.infinity`][].
A box that tries to be as big as possible won't
function usefully when given an unbounded constraint and,
in debug mode, throws an exception.
The most common case where a render box ends up
with an unbounded constraint is within a flex box
([`Row`][] or [`Column`][]),
and **within a scrollable region**
(such as [`ListView`][] and other [`ScrollView`][] subclasses).
[`ListView`][], for example,
tries to expand to fit the space available
in its cross-direction
(perhaps it's a vertically-scrolling block and
tries to be as wide as its parent).
If you nest a vertically scrolling [`ListView`][]
inside a horizontally scrolling `ListView`,
the inner list tries to be as wide as possible,
which is infinitely wide,
since the outer one is scrollable in that direction.
The next section describes the error you might
encounter with unbounded constraints in a `Flex` widget.
## Flex
A flex box ([`Row`][] and [`Column`][]) behaves
differently depending on whether its
constraint is bounded or unbounded in
its primary direction.
A flex box with a bounded constraint in its
primary direction tries to be as big as possible.
A flex box with an unbounded constraint
in its primary direction tries to fit its children
in that space. Each child's `flex` value must be
set to zero, meaning that you can't use
[`Expanded`][] when the flex box is inside
another flex box or a scrollable;
otherwise it throws an exception.
The _cross_ direction
(width for [`Column`][] or height for [`Row`][]),
must _never_ be unbounded,
or it can't reasonably align its children.
[`double.infinity`]: https://api.flutter-io.cn/flutter/dart-core/double/infinity-constant.html
[`Expanded`]: https://api.flutter-io.cn/flutter/widgets/Expanded-class.html
[`RenderBox`]: https://api.flutter-io.cn/flutter/rendering/RenderBox-class.html
[`ScrollView`]: https://api.flutter-io.cn/flutter/widgets/ScrollView-class.html
## Learning the layout rules for specific widgets
## 了解如何为特定 widget 制定布局规则
Knowing the general layout rule is necessary, but it's not enough.
掌握通用布局是非常重要的,但这还不够。
Each widget has a lot of freedom when applying the general rule,
so there is no way of knowing how it behaves by just reading
the widget's name.
应用一般规则时,每个 widget 都具有很大的自由度,
所以没有办法只看 widget 的名称就知道可能它长什么样。
If you try to guess, you'll probably guess wrong.
You can't know exactly how a widget behaves unless
you've read its documentation, or studied its source-code.
如果你尝试推测,可能就会猜错。
除非你已阅读 widget 的文档或研究了其源代码,
否则你无法确切知道 widget 的行为。
The layout source-code is usually complex,
so it's probably better to just read the documentation.
However, if you decide to study the layout source-code,
you can easily find it by using the navigating capabilities
of your IDE.
布局源代码通常很复杂,因此阅读文档是更好的选择。
但是当你在研究布局源代码时,可以使用 IDE 的导航功能轻松找到它。
Here's an example:
下面是一个例子:
* Find a `Column` in your code and navigate to its
source code. To do this, use `command+B` (macOS)
or `control+B` (Windows/Linux) in Android Studio or IntelliJ.
You'll be taken to the `basic.dart` file.
Since `Column` extends `Flex`, navigate to the `Flex`
source code (also in `basic.dart`).
在你的代码中找到一个 `Column` 并跟进到它的源代码。
为此,请在 (Android Studio/IntelliJ) 中使用
`command+B`(macOS)或 `control+B`(Windows/Linux)。
你将跳到 `basic.dart` 文件中。由于 `Column` 扩展了 `Flex`,
请导航至 `Flex` 源代码(也位于 `basic.dart` 中)。
* Scroll down until you find a method called
`createRenderObject()`. As you can see,
this method returns a `RenderFlex`.
This is the render-object for the `Column`.
Now navigate to the source-code of `RenderFlex`,
which takes you to the `flex.dart` file.
向下滚动直到找到一个名为 `createRenderObject()` 的方法。
如你所见,此方法返回一个 `RenderFlex`。
它是 `Column` 的渲染对象,
现在导航到 `flex.dart` 文件中的 `RenderFlex` 的源代码。
* Scroll down until you find a method called
`performLayout()`. This is the method that does
the layout for the `Column`.
向下滚动,直到找到 `performLayout()` 方法,
由该方法执行列布局。
 ---
Original article by Marcelo Glasberg
本文作者:Marcelo Glasberg
Marcelo originally published this content as
[Flutter: The Advanced Layout Rule Even Beginners Must Know][article]
on Medium. We loved it and asked that he allow us to publish
in on docs.flutter.dev, to which he graciously agreed. Thanks, Marcelo!
You can find Marcelo on [GitHub][] and [pub.dev][].
Marcelo 最初在 Medium 发表
[Flutter: The Advanced Layout Rule Even Beginners Must Know][article] 本文。
我们十分喜欢这篇文章,在征得他的允许后发布在 flutter.dev。再次感谢你,Marcelo!
你可以找到 [GitHub][] 以及 [pub.dev][] 找到 Marcelo。
Also, thanks to [Simon Lightfoot][] for creating the
header image at the top of the article.
同时,还要感谢 [Simon Lightfoot][] 创造了本文的标题图片。
[article]: https://medium.com/flutter-community/flutter-the-advanced-layout-rule-even-beginners-must-know-edc9516d1a2
[GitHub]: https://github.com/marcglasberg
[pub.dev]: https://pub-web.flutter-io.cn/publishers/glasberg.dev/packages
[Simon Lightfoot]: https://github.com/slightfoot
:::note
To better understand how Flutter implements layout
constraints, check out the following 5-minute video:
想要更好地了解 Flutter 如何实现布局限制,
你可以观看这段 5 分钟的视频:
:::
---
Original article by Marcelo Glasberg
本文作者:Marcelo Glasberg
Marcelo originally published this content as
[Flutter: The Advanced Layout Rule Even Beginners Must Know][article]
on Medium. We loved it and asked that he allow us to publish
in on docs.flutter.dev, to which he graciously agreed. Thanks, Marcelo!
You can find Marcelo on [GitHub][] and [pub.dev][].
Marcelo 最初在 Medium 发表
[Flutter: The Advanced Layout Rule Even Beginners Must Know][article] 本文。
我们十分喜欢这篇文章,在征得他的允许后发布在 flutter.dev。再次感谢你,Marcelo!
你可以找到 [GitHub][] 以及 [pub.dev][] 找到 Marcelo。
Also, thanks to [Simon Lightfoot][] for creating the
header image at the top of the article.
同时,还要感谢 [Simon Lightfoot][] 创造了本文的标题图片。
[article]: https://medium.com/flutter-community/flutter-the-advanced-layout-rule-even-beginners-must-know-edc9516d1a2
[GitHub]: https://github.com/marcglasberg
[pub.dev]: https://pub-web.flutter-io.cn/publishers/glasberg.dev/packages
[Simon Lightfoot]: https://github.com/slightfoot
:::note
To better understand how Flutter implements layout
constraints, check out the following 5-minute video:
想要更好地了解 Flutter 如何实现布局限制,
你可以观看这段 5 分钟的视频:
:::